Questions and answers
A question is one screen with a set of answers, and every answer carries the products it votes for. By the end of this page your quiz holds its questions, their answers, the products behind those answers, and the sequence the customer goes through.
Before you start
- A quiz open on its Questions tab.
- At least one product in your online store, so an answer has something to vote for.
Add a question
The left sidebar holds the sequence of pages. Add a question from the bottom of that list.
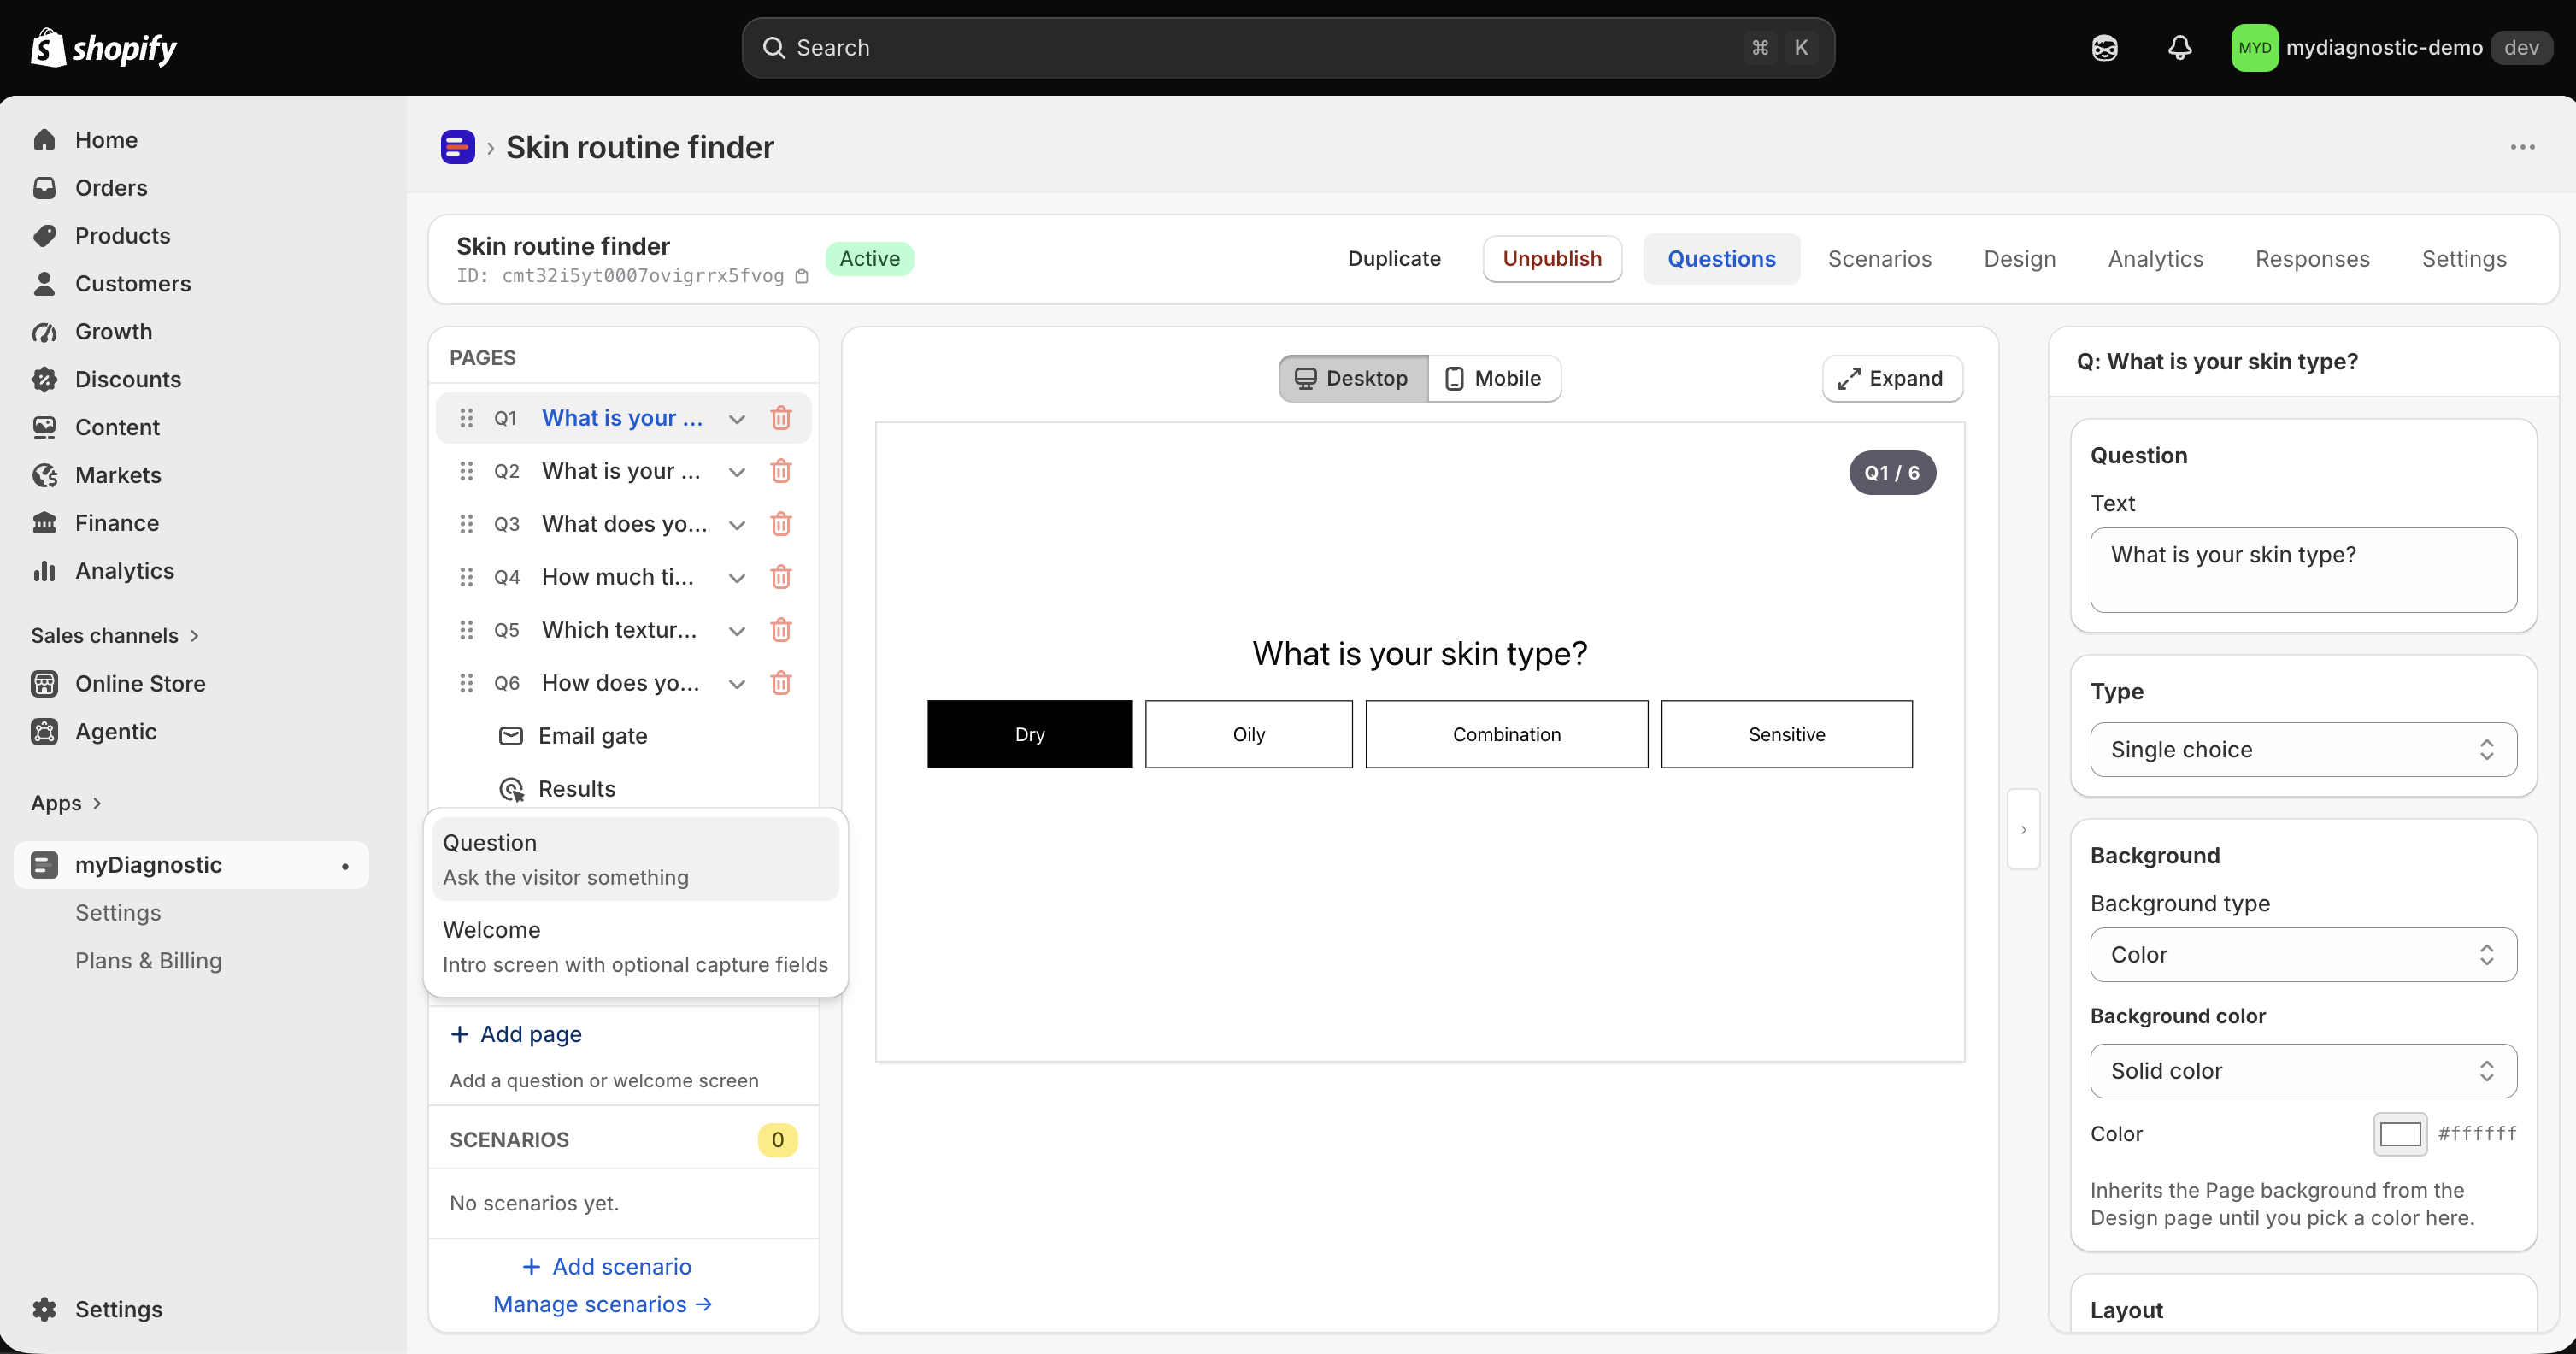
- Select Add page at the bottom of the left sidebar.
- Select Question in the menu, described there as Ask the visitor something.
On a quiz that has no question yet, the middle of the screen reads Add your first question and carries an Add a question button. It does the same thing.
The menu also offers Welcome, described as Intro screen with optional capture fields. A quiz holds one welcome screen at most, so that entry disappears from the menu once yours has one.
A new question arrives named New question, with no answers, at the end of the sequence. It is written to the quiz straight away, which is why Add page is disabled while you have unsaved changes, with the title Save or discard your changes first.
Write the question
Select the question in the left sidebar. Its settings open in the panel on the right.
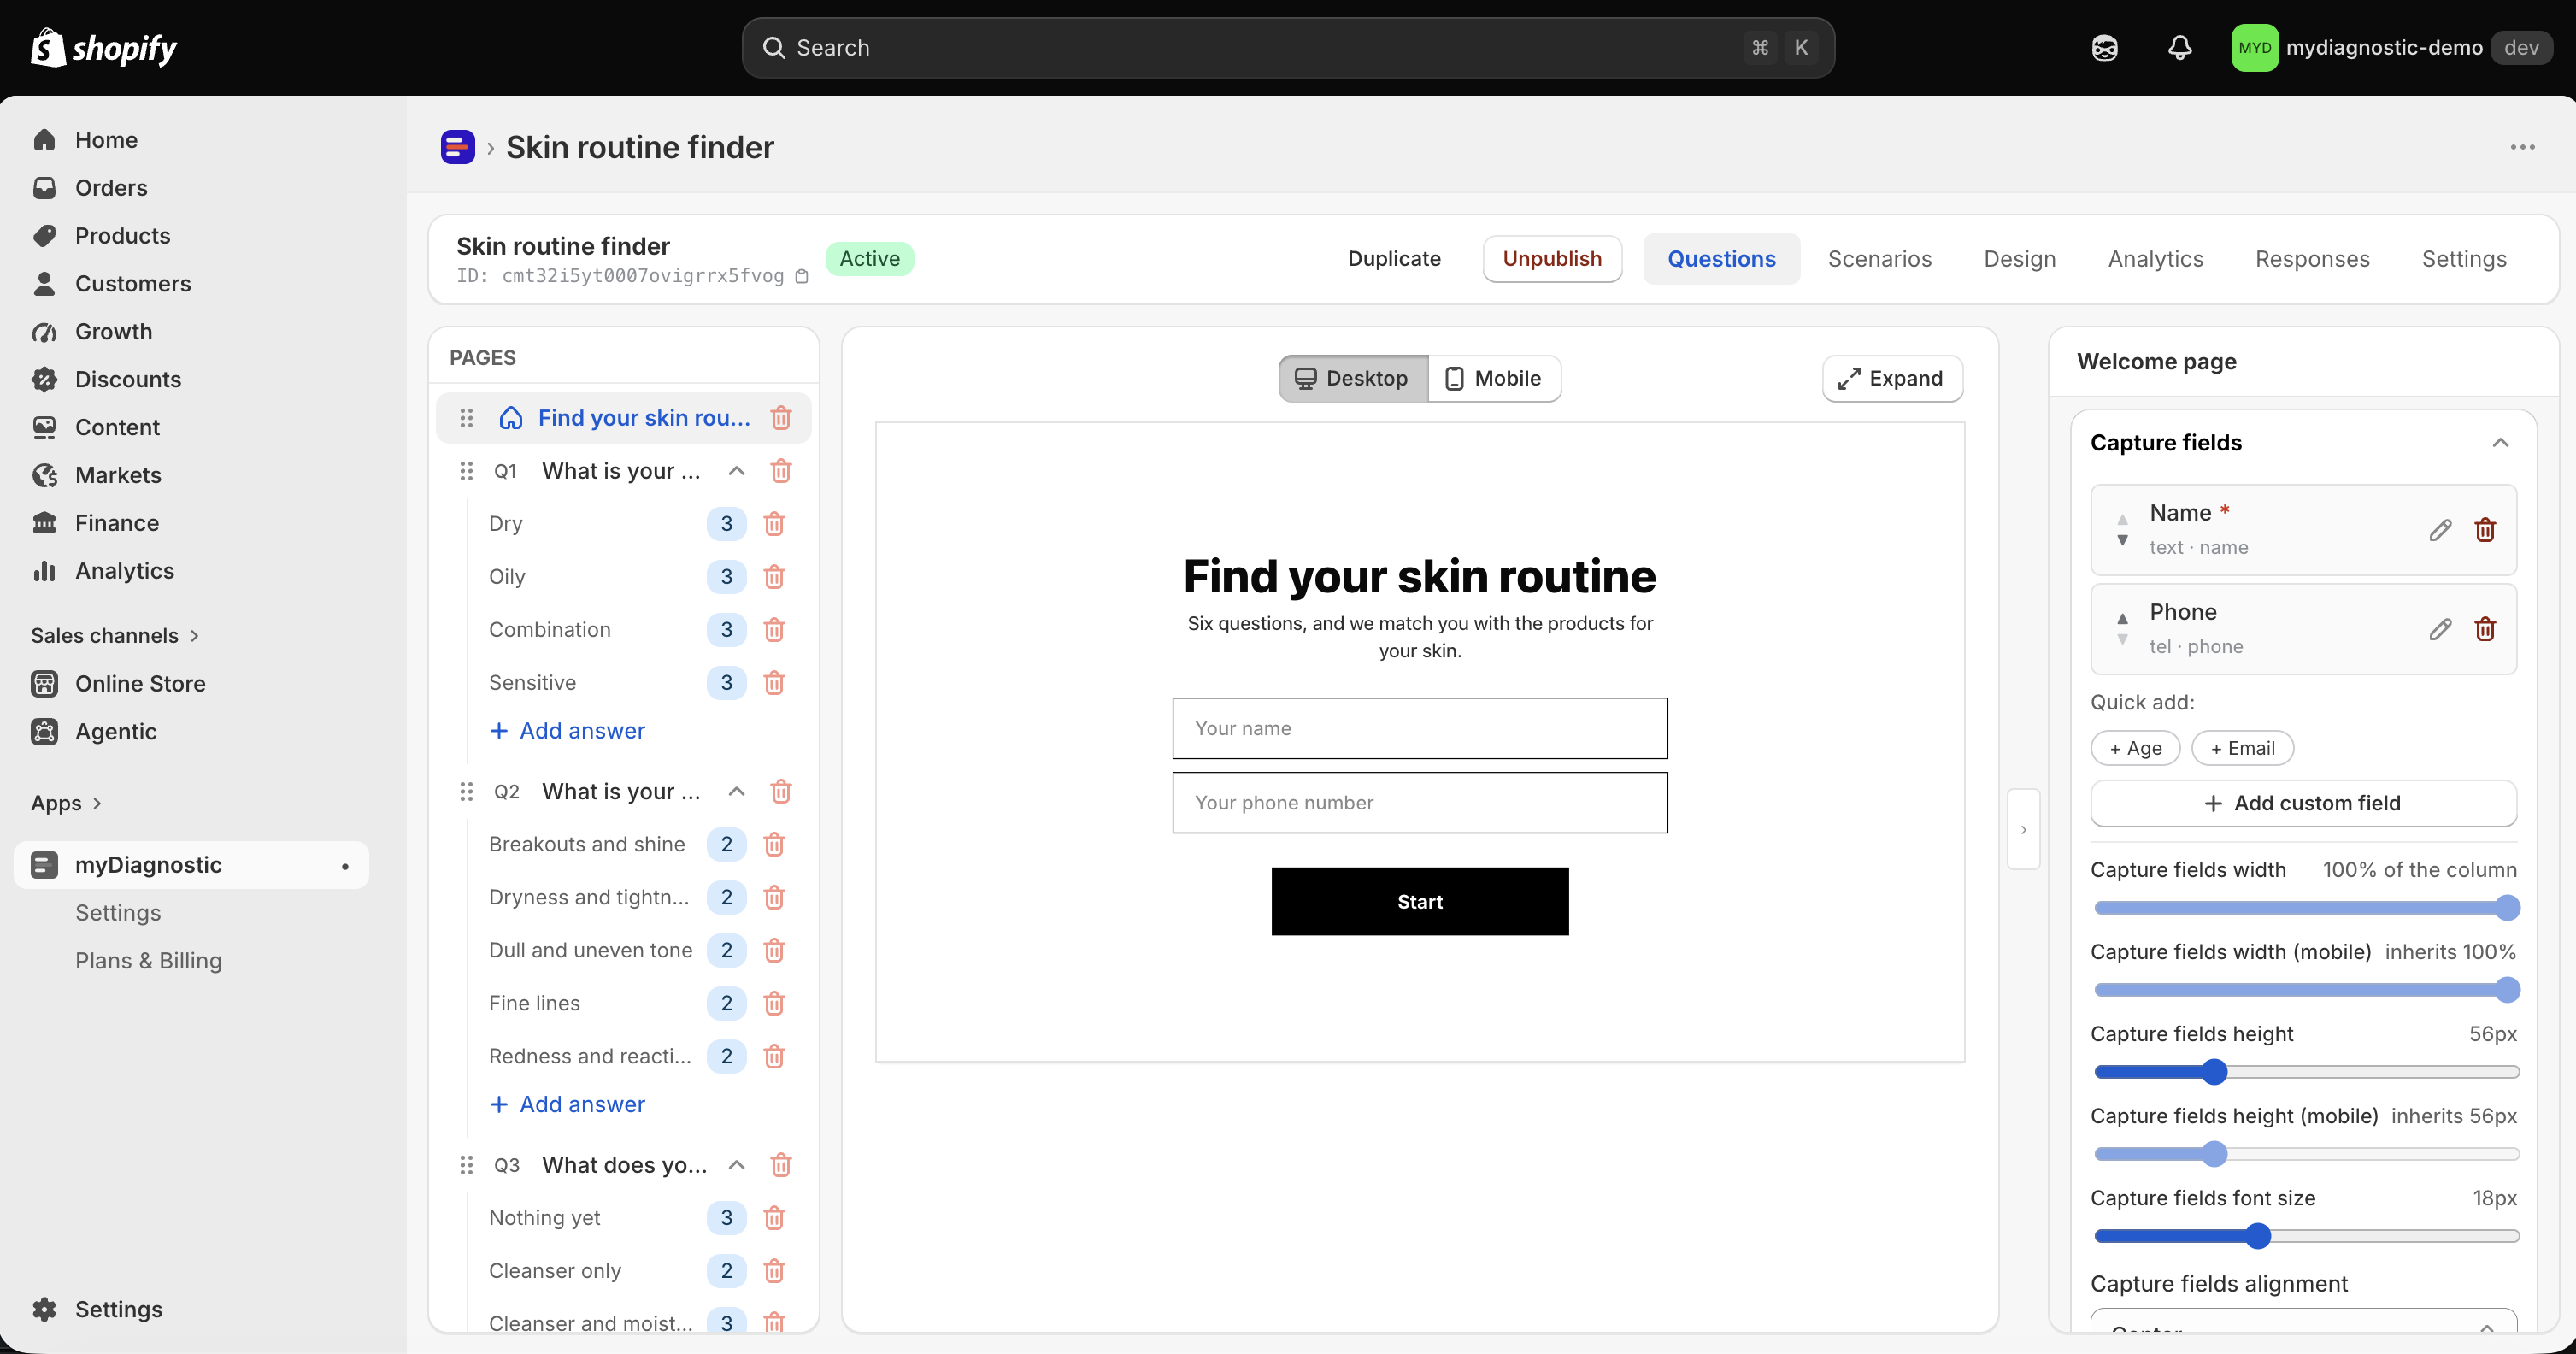
- Enter your wording in Text, in the Question section.
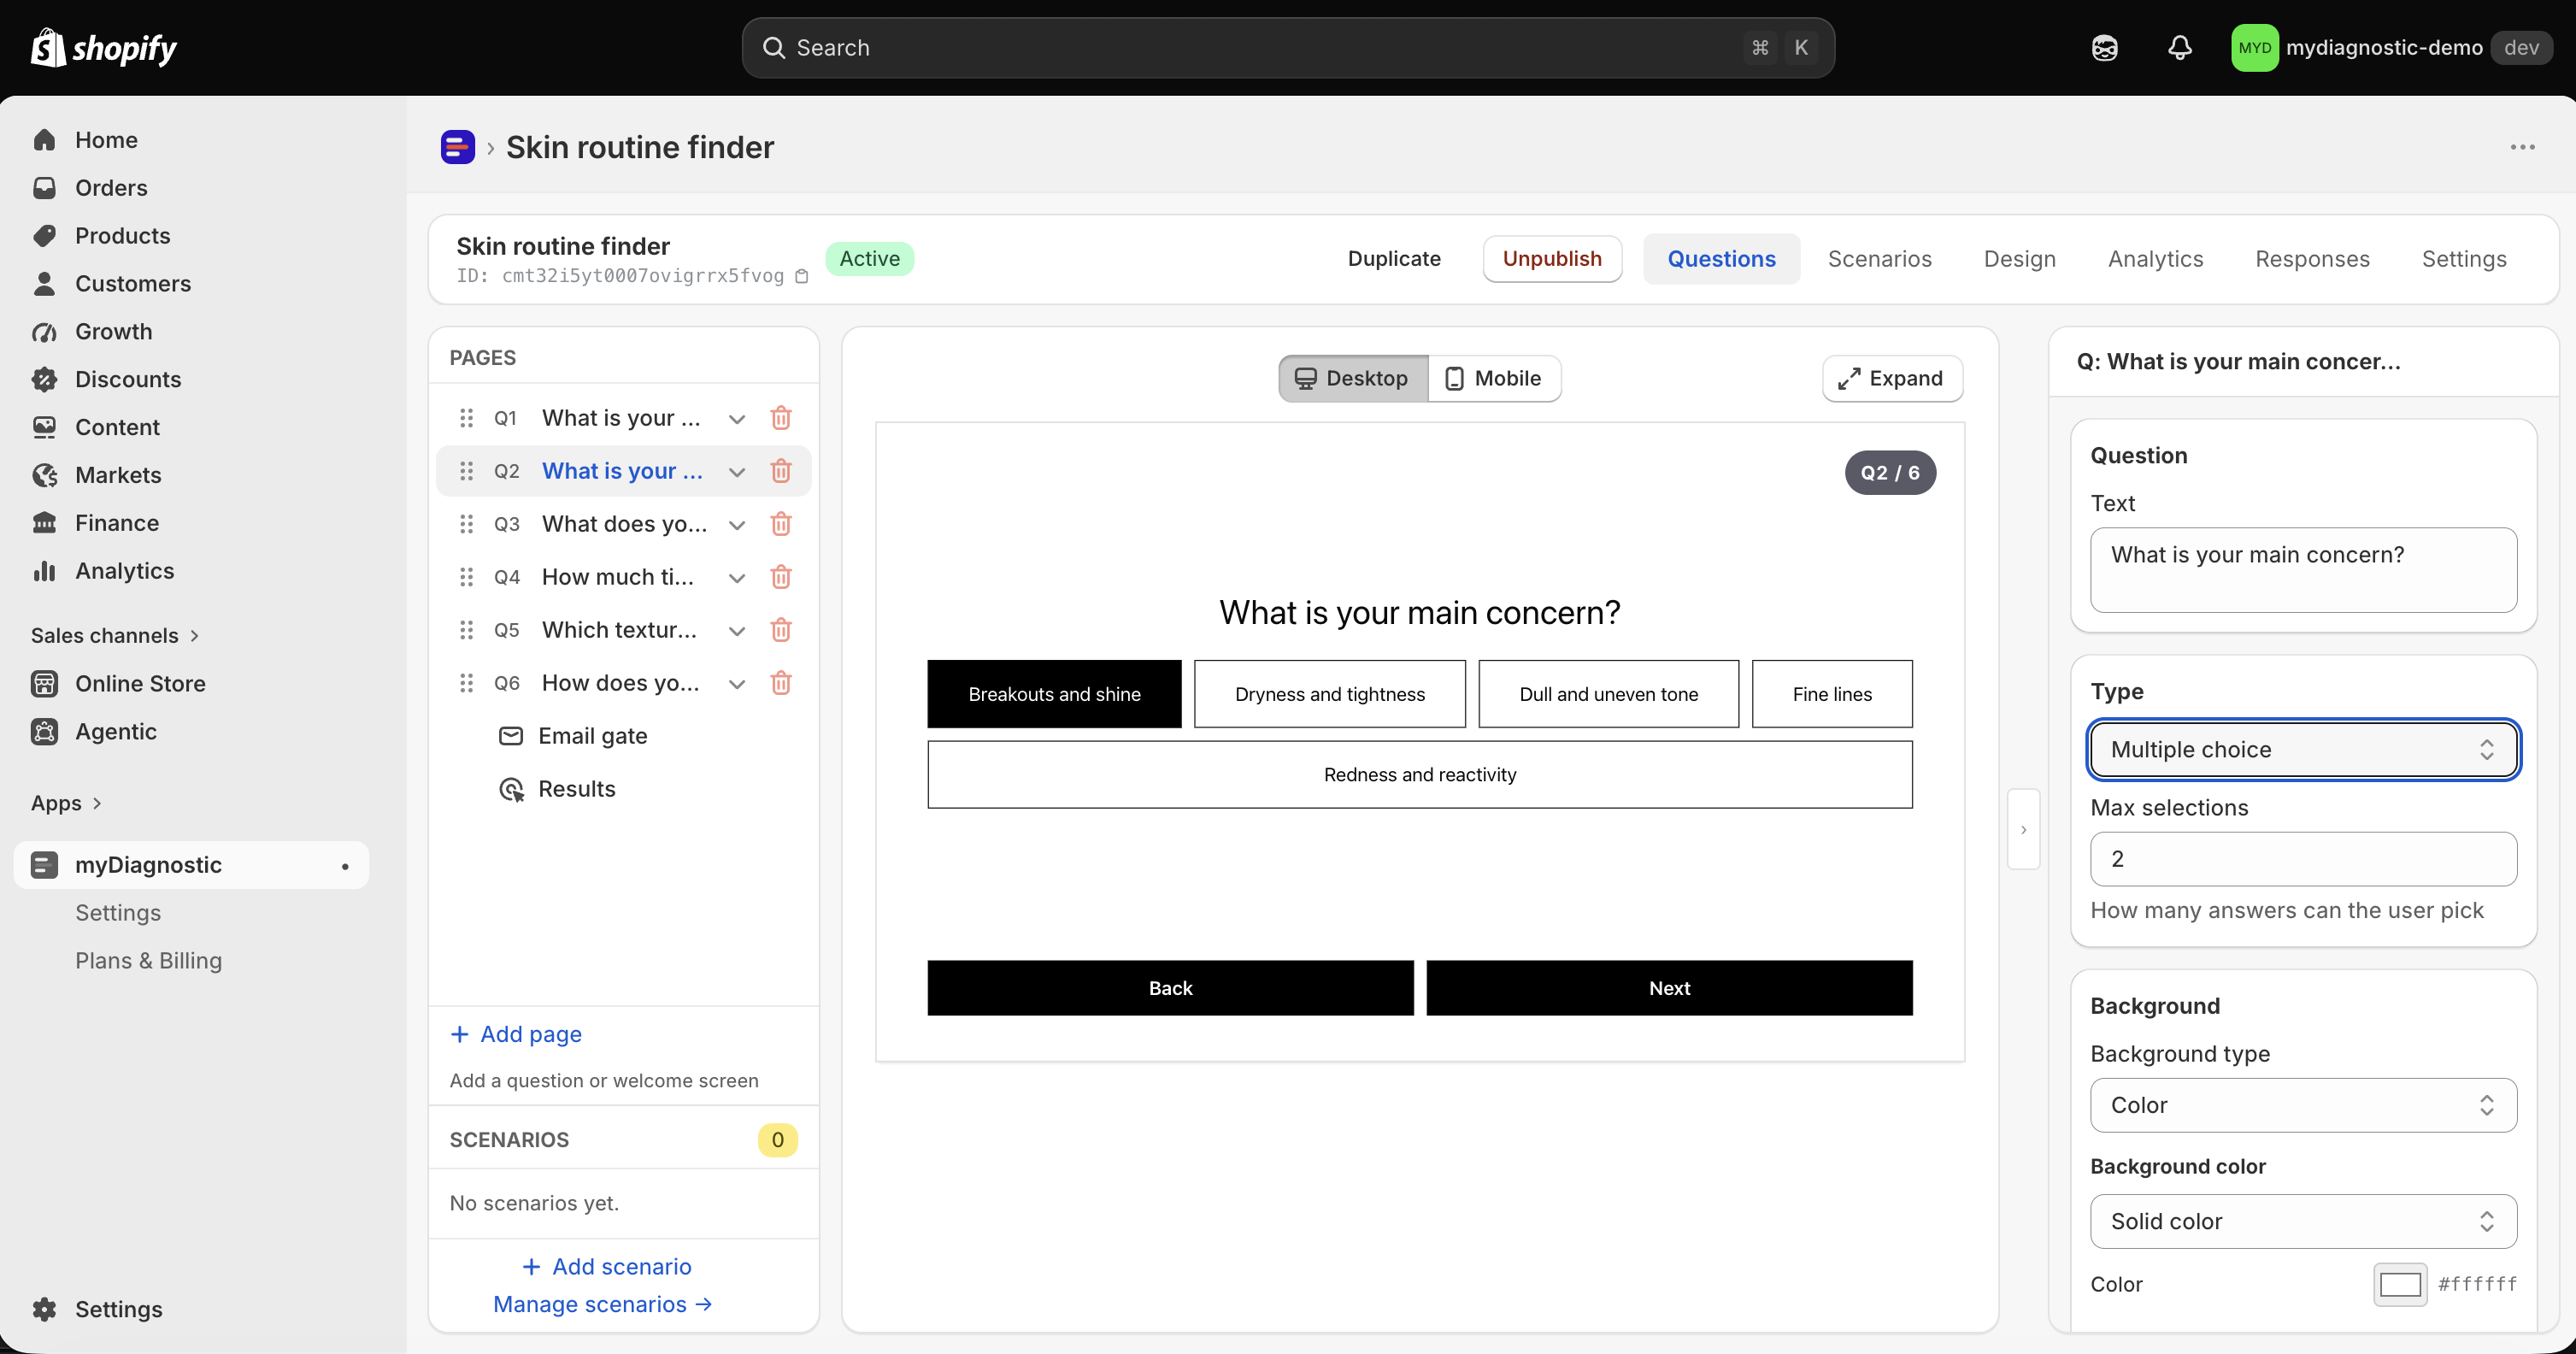
- Choose Single choice or Multiple choice in the Type section.
- On a multiple choice question, enter a number in Max selections.
On a Single choice question the customer picks one answer, and picking another replaces it.
On a Multiple choice question the customer picks several. Max selections carries the help text How many answers can the user pick, and it is the ceiling: once the customer has picked that many, the remaining answers stop responding until one of the picked answers is unpicked. Next stays disabled until at least one answer is picked.
Add an image to the question
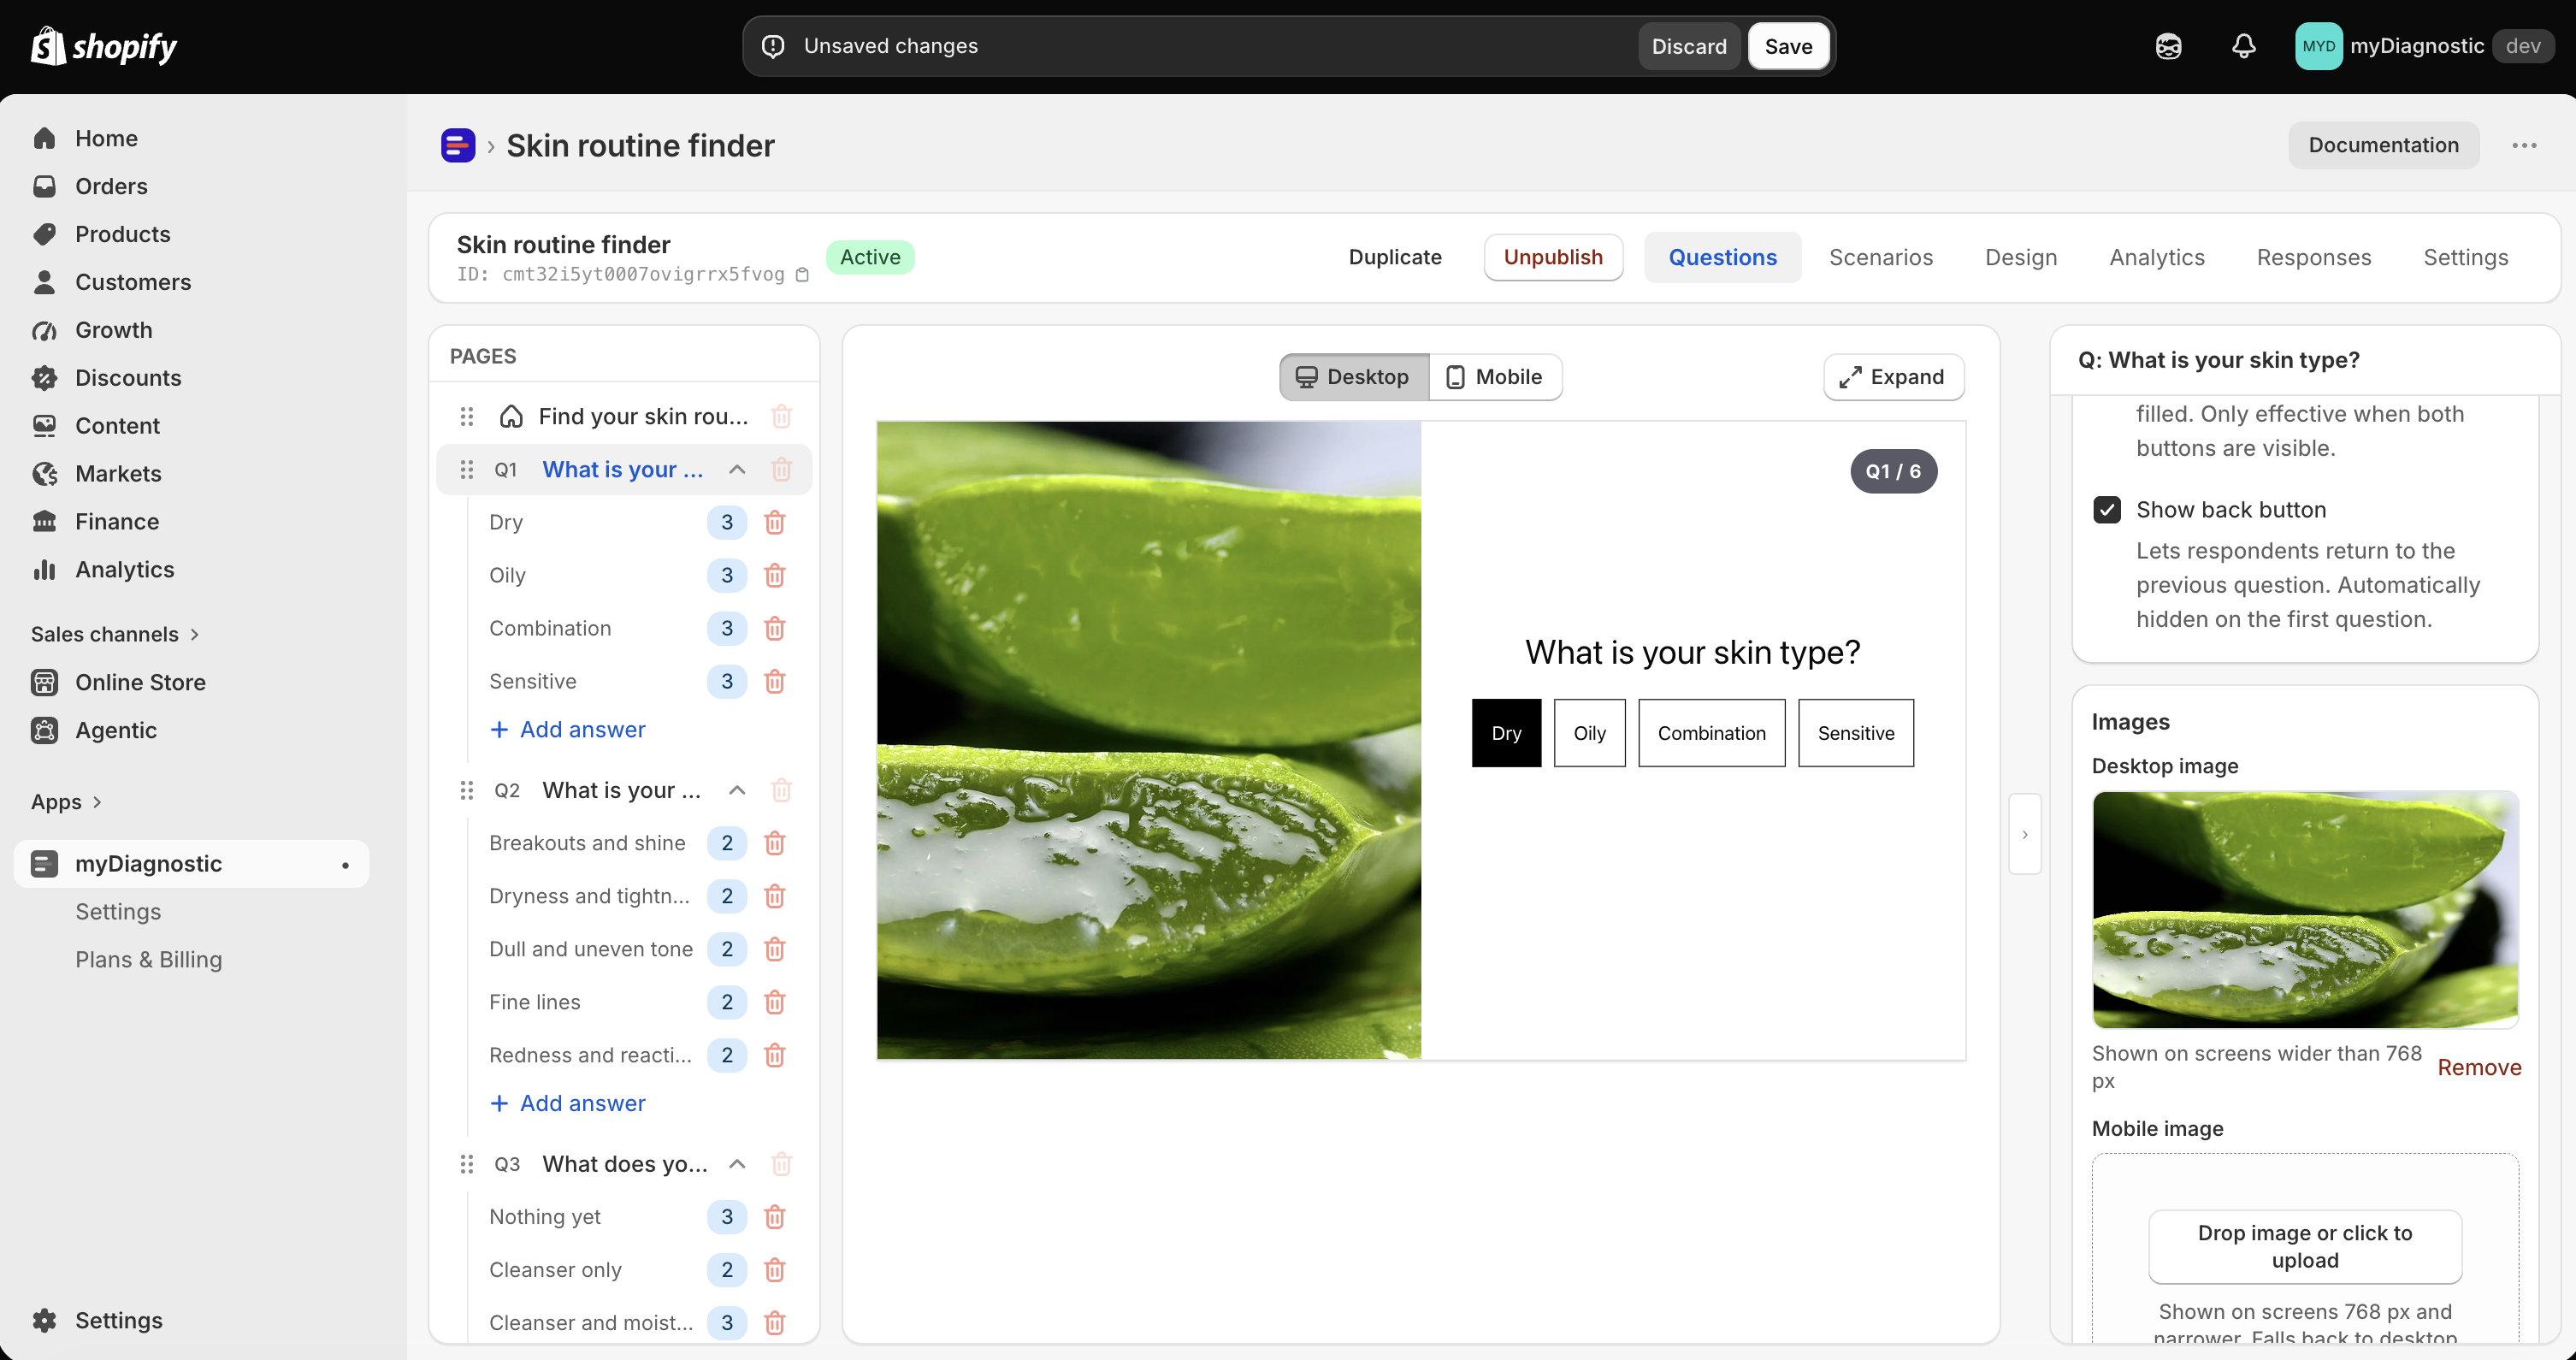
The Images section of the question panel sits under Layout, and it takes two uploads.
Desktop image carries the help text Shown on screens wider than 768 px, and Mobile image carries Shown on screens 768 px and narrower. Falls back to desktop if empty.
That fallback runs one way only. A phone shows the desktop image when you leave the mobile one empty, and a desktop never shows the mobile image, so upload the desktop image first and add a mobile one only when the framing needs it. Both go to your Shopify files the moment you pick the file, before any save.
The section disappears when the question is set to carry no image at all. That happens in its Layout section: untick Use global theme settings for this page, then set Image position to None (no image, content full-screen). The uploads go with it, since nothing would render them. That box sits on every page of the quiz and is what opens the per page overrides, see Design tokens.
Where the image sits next to the question
Placement belongs to the quiz rather than to the question. The Layout card of Granular controls (advanced), on the Design tab, holds Image position, which decides the side the image takes, and Image size, which gives it between 20 and 70 percent of the width. The question and its answers take the rest, see Design tokens.
A question with no image renders no image panel at all: its content takes the full width, whatever the position says. A quiz where only some questions carry an image alternates between the two layouts, which is expected and needs no setting.
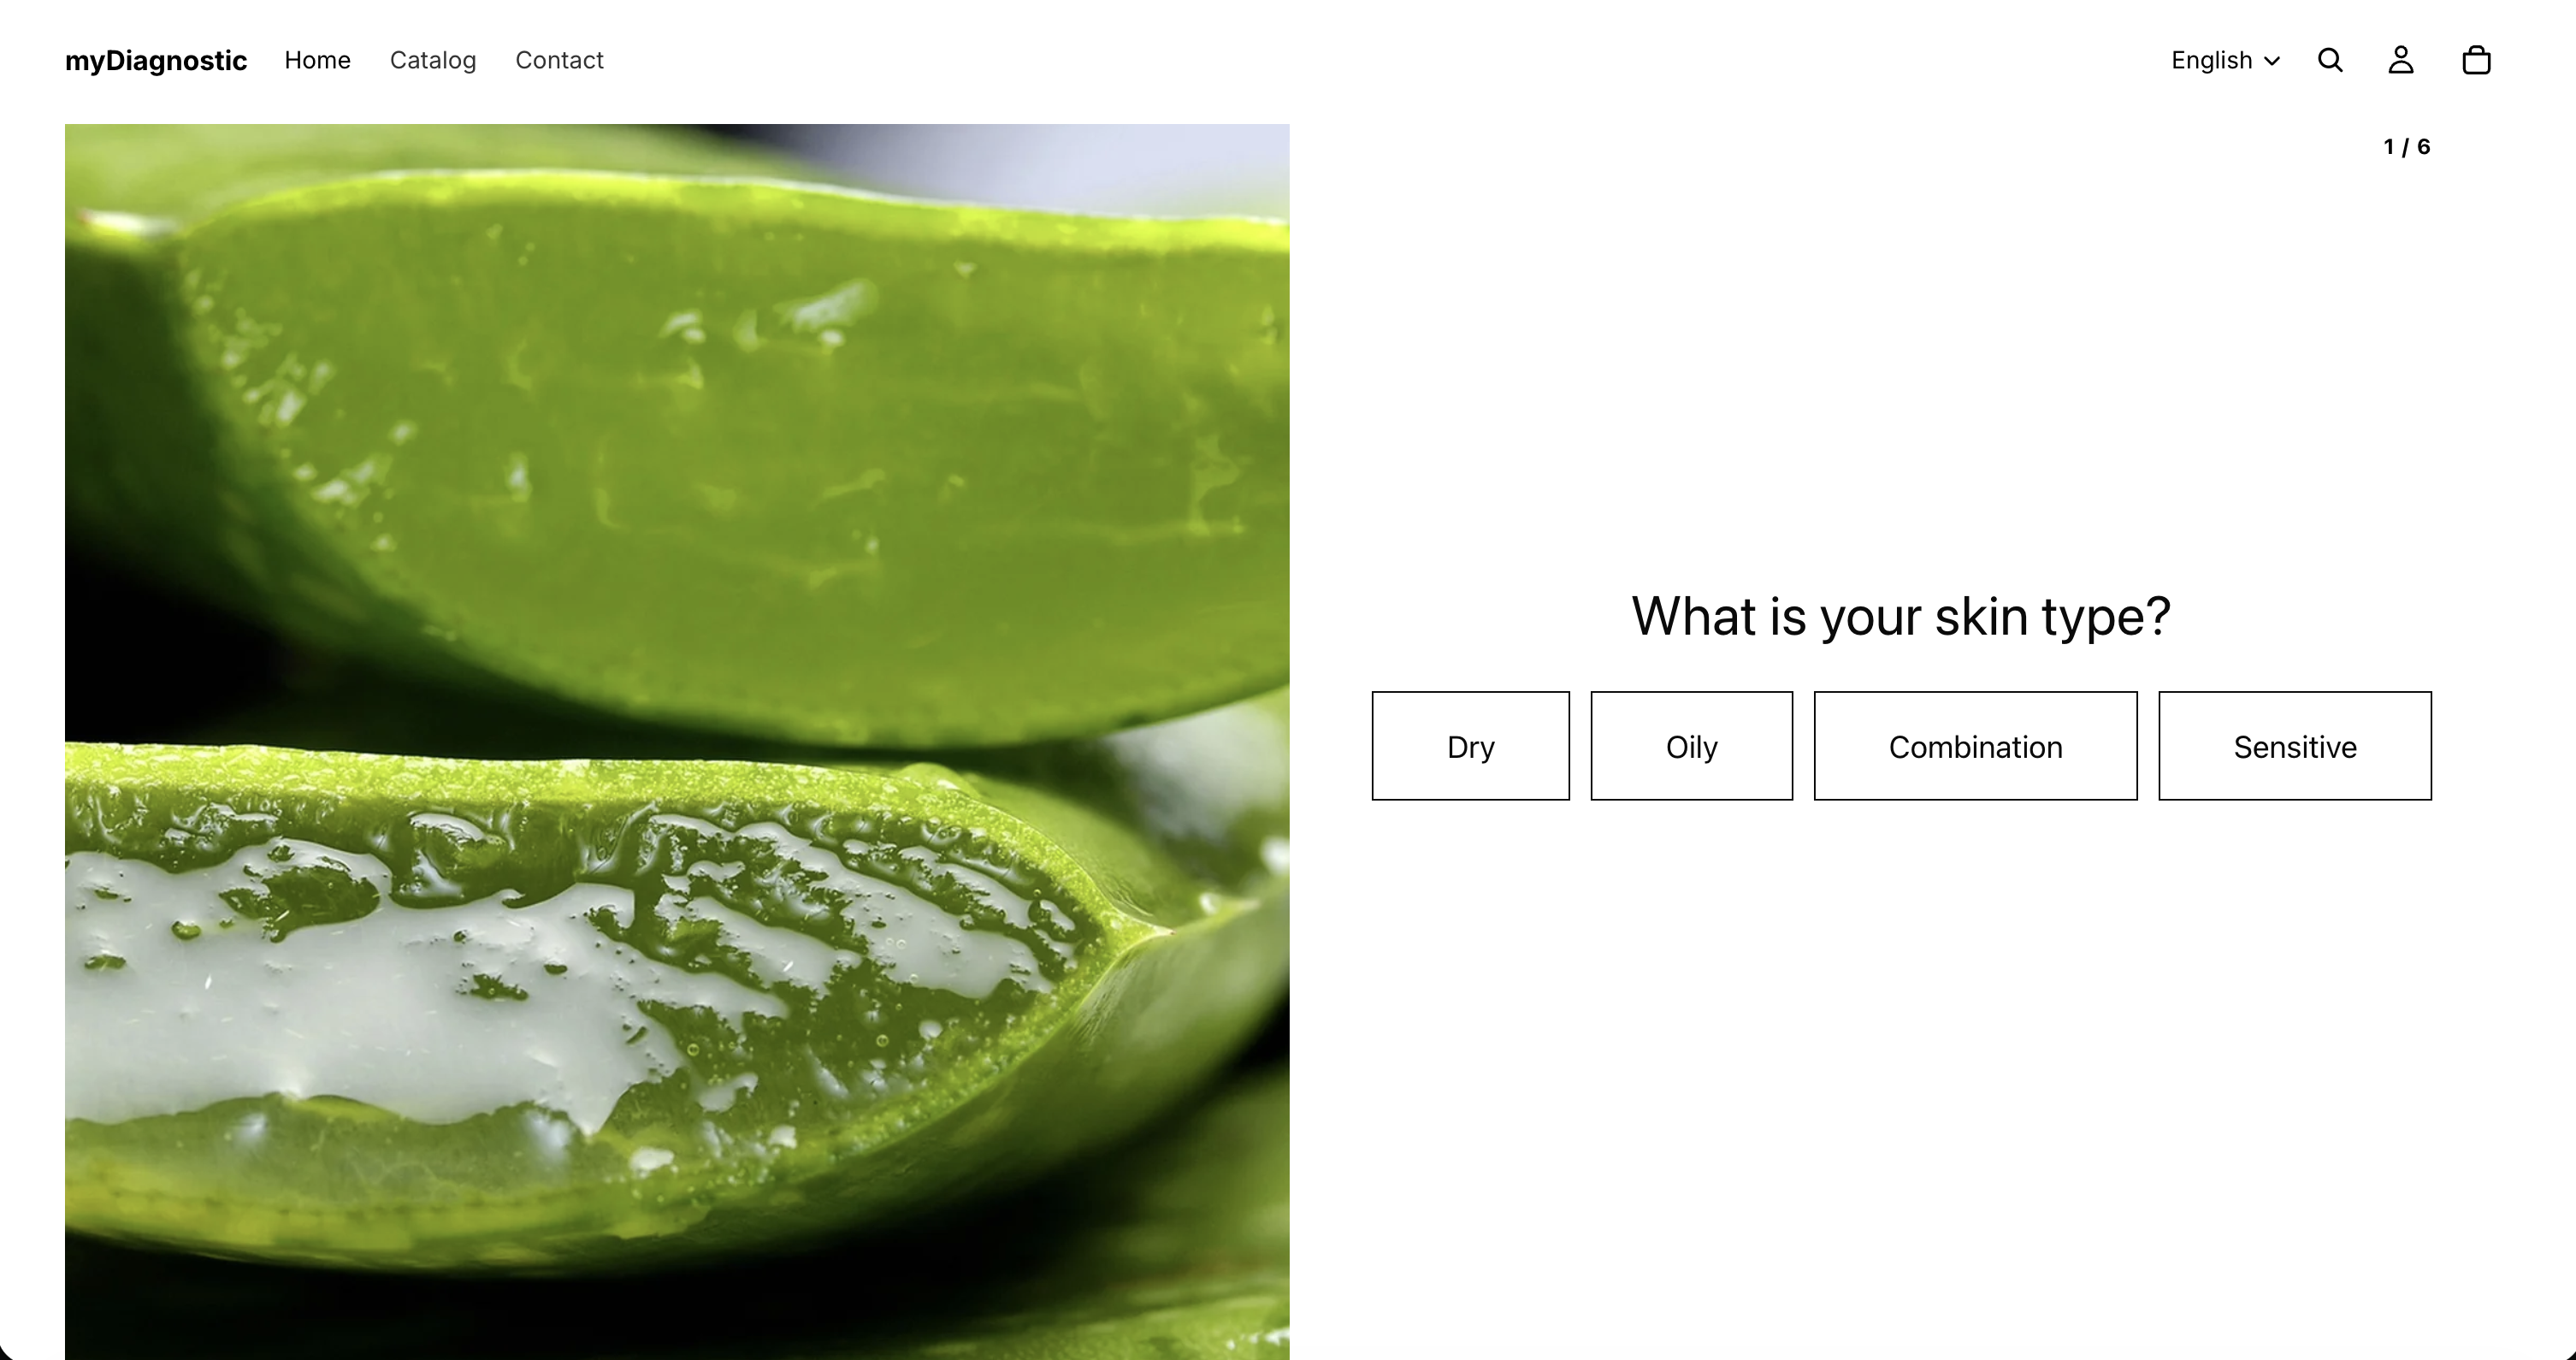
Below 768 px the two columns become one and the image goes above the content. The Mobile section of the question changes that for that question alone. Show image on mobile hides it, with the help text Hide the question image on screens 767 px and narrower for this question only., and Image position on mobile offers Top or Bottom.
Choose how the answers are displayed
The Answer Display section holds one setting, Display mode, with the help text How answer buttons are laid out on the storefront.
- Grid (pills, 2-3 columns) lays the answers out as pills over two or three columns, each pill only as wide as its own label. Suits short answers.
- Stacked (full-width list) gives each answer its own row, the full width of the column. Suits long answers, and answers whose length varies a lot.
The setting belongs to the question, so each question can be displayed differently.
Add the answers
- Select the question in the left sidebar, which expands to show its answers.
- Select Add answer under the last answer of that question.
- Enter the wording in the Answer label section on the right.
A new answer arrives named New answer, at the end of the list, and the panel on the right switches to it. Nothing is written to the quiz until you select Save.
An answer carries a label and the products it votes for. Nothing else, and two limits follow from that.
An answer has no image of its own. How the answer buttons look is set once per question, in the Layout section of the question: Pills height, Pills max width, Pills row alignment, Stretch pills to row width, and Pills font size once Override theme font size is on. Those apply to every answer of that question at the same time.
Answers cannot be reordered. They stay in the order you added them, in the sidebar and in front of the customer. There is no handle to drag and no arrow to move one. To change the order, delete the answers that are in the wrong place and add them again in the order you want, then attach their products again.
To delete an answer, select the trash icon on its row in the sidebar. The confirmation is titled Delete answer? and reads Nothing is written until you press Save. Use Discard to undo. The trash icon in the Answer label section deletes it without asking. Either way, the answer comes back with Discard as long as you have not saved.
Attach products to an answer
This is what makes the quiz recommend anything: an answer with no product changes nothing for the customer.
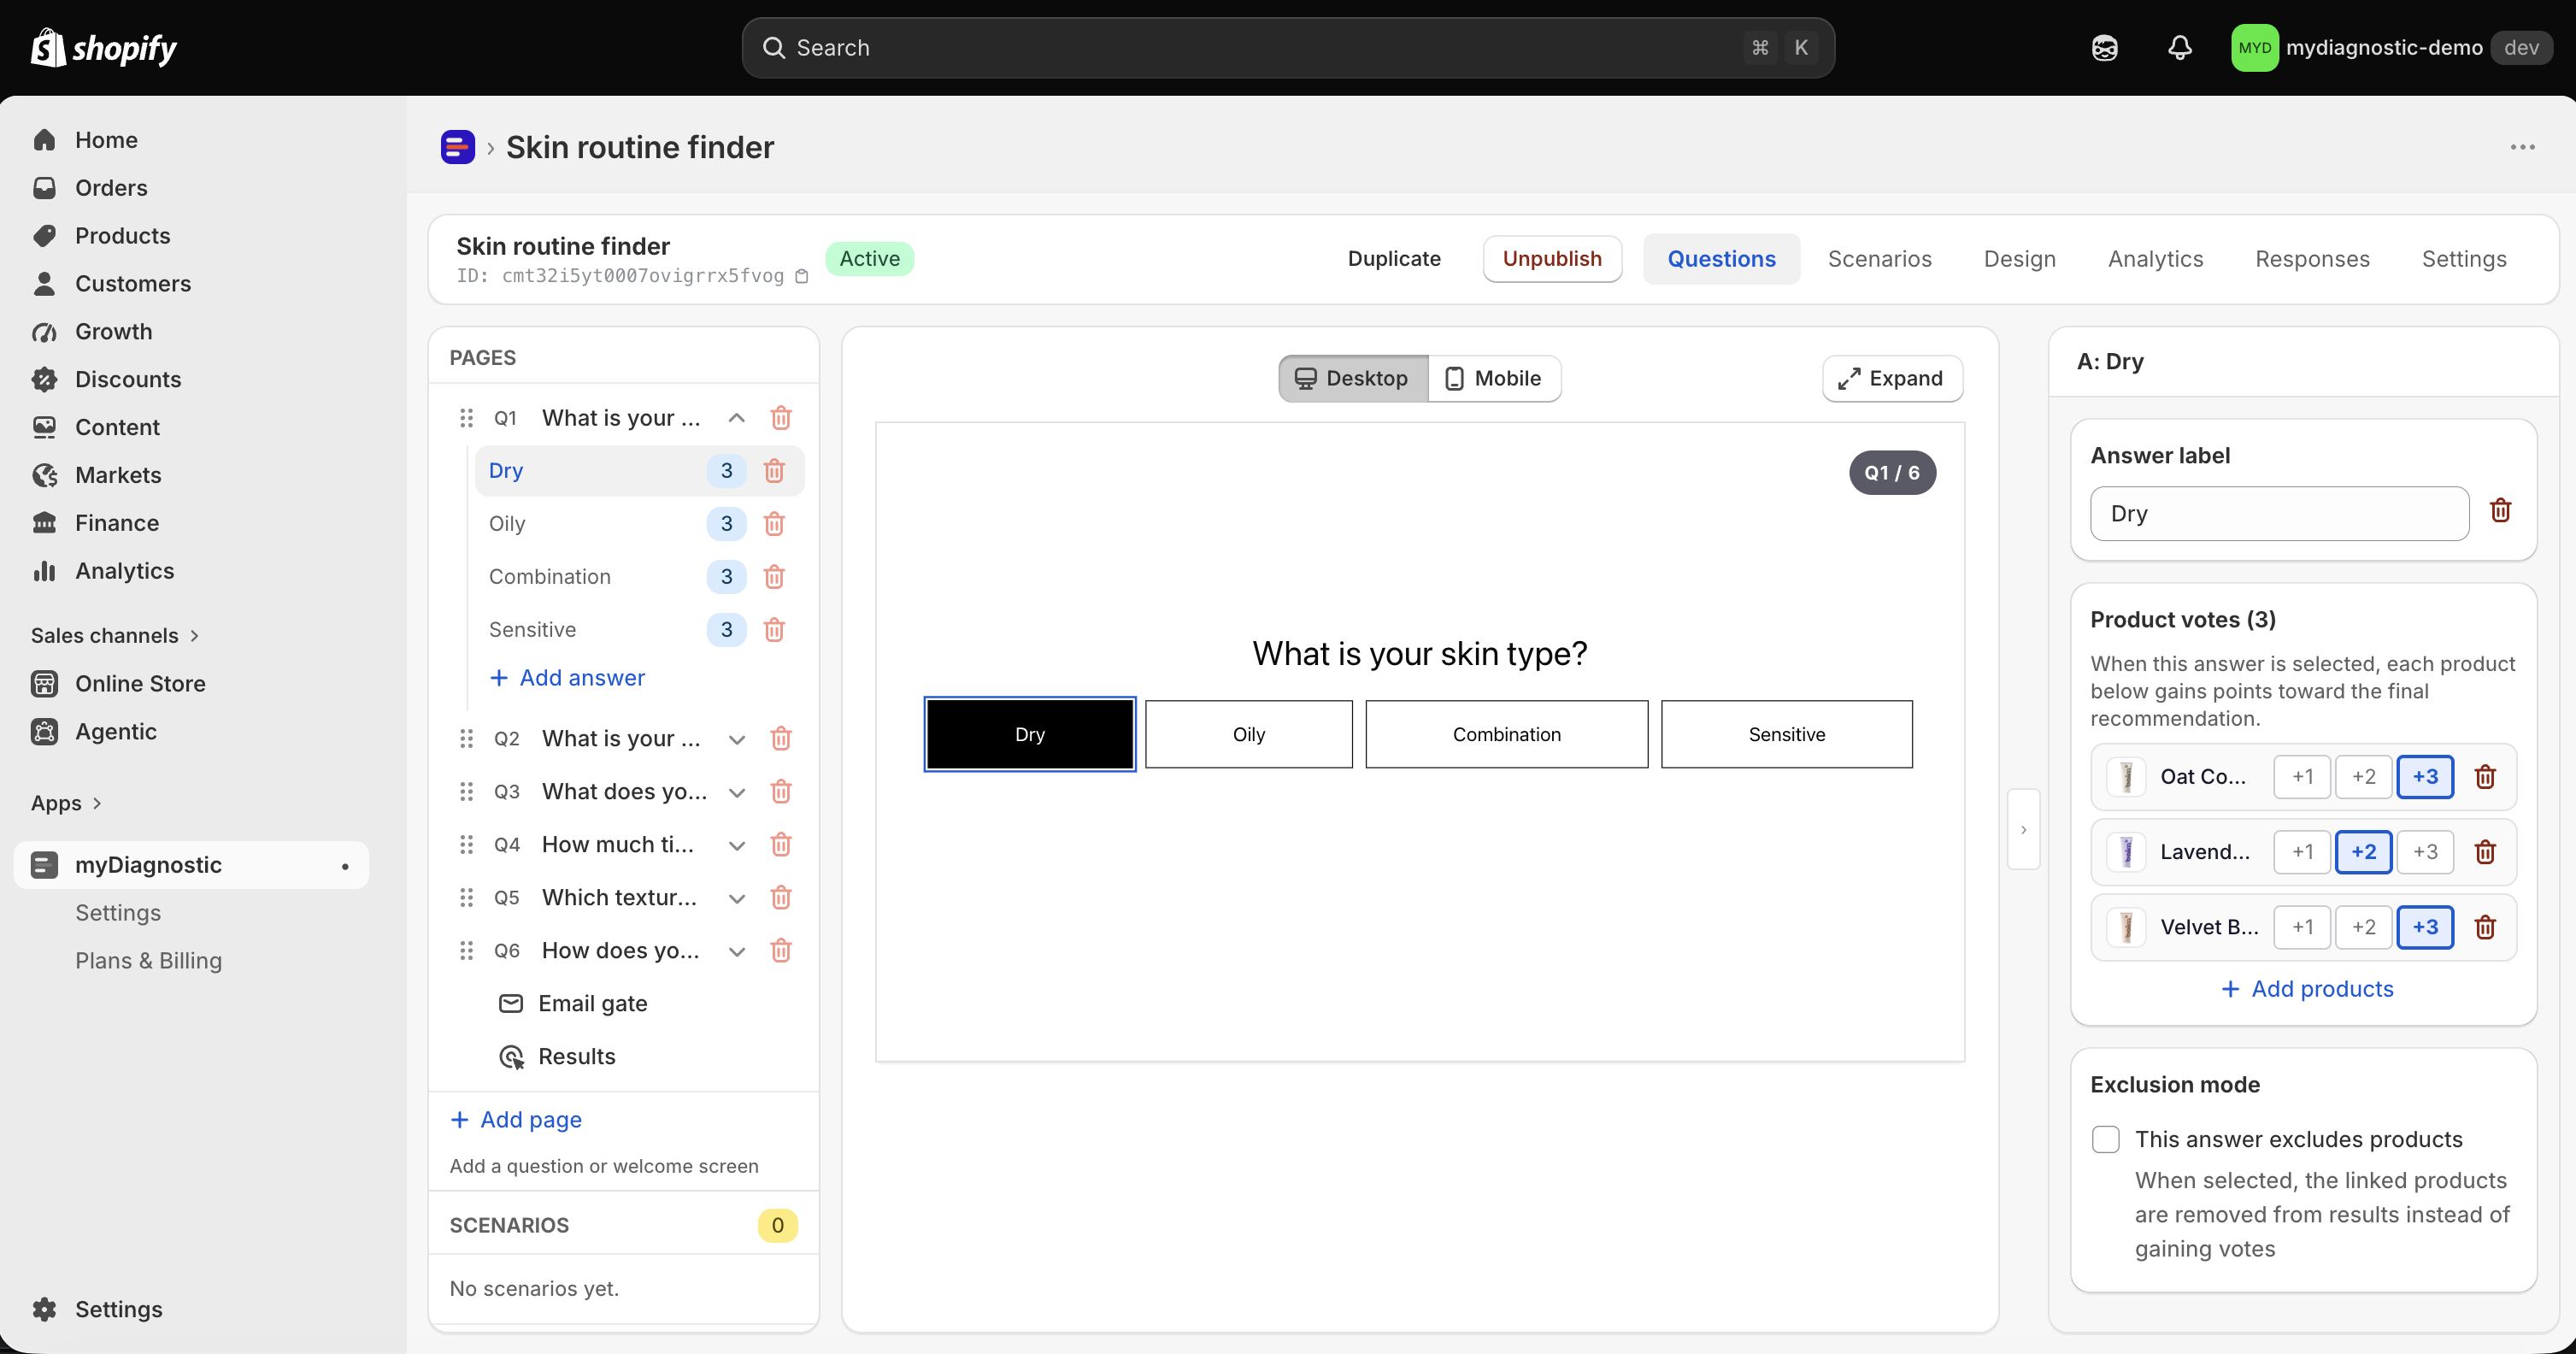
- Select the answer in the left sidebar.
- Select Add products in the Product votes section.
- Select one or several products in the Shopify picker, then confirm.
- Select a weight for each product: +1, +2 or +3.
The section states the rule itself: When this answer is selected, each product below gains points toward the final recommendation.
A product appears once per answer, so picking it a second time in the picker adds nothing. Attach the same product to as many answers as you want: the points it collects add up across all of them.
To take a product off an answer, select the trash icon at the end of its row.
How the result is worked out
- Every answer the customer selects adds its weight to each product attached to it. A product on +3 gains three times what a product on +1 gains.
- Once the last question is answered, the three products with the most points are the result.
- Two products on the same number of points are always ordered the same way, so the same answers always produce the same three products.
- When fewer than three products have collected points, the result shows the one or two that did.
- When no product has collected any point, the customer reads Quiz temporarily unavailable. Please try again. and the response is not recorded: it appears in no report and counts towards no monthly total.
The whole calculation runs in the customer's browser, at the moment they answer the last question, so the result appears with no waiting and no round trip to a server.
The three products are then matched against your scenarios, which is covered in Result scenarios. The wording of the unavailable message is yours to change, see App wording.
Exclude products with an answer
An excluding answer does the opposite of a vote: it takes its products out of the running.
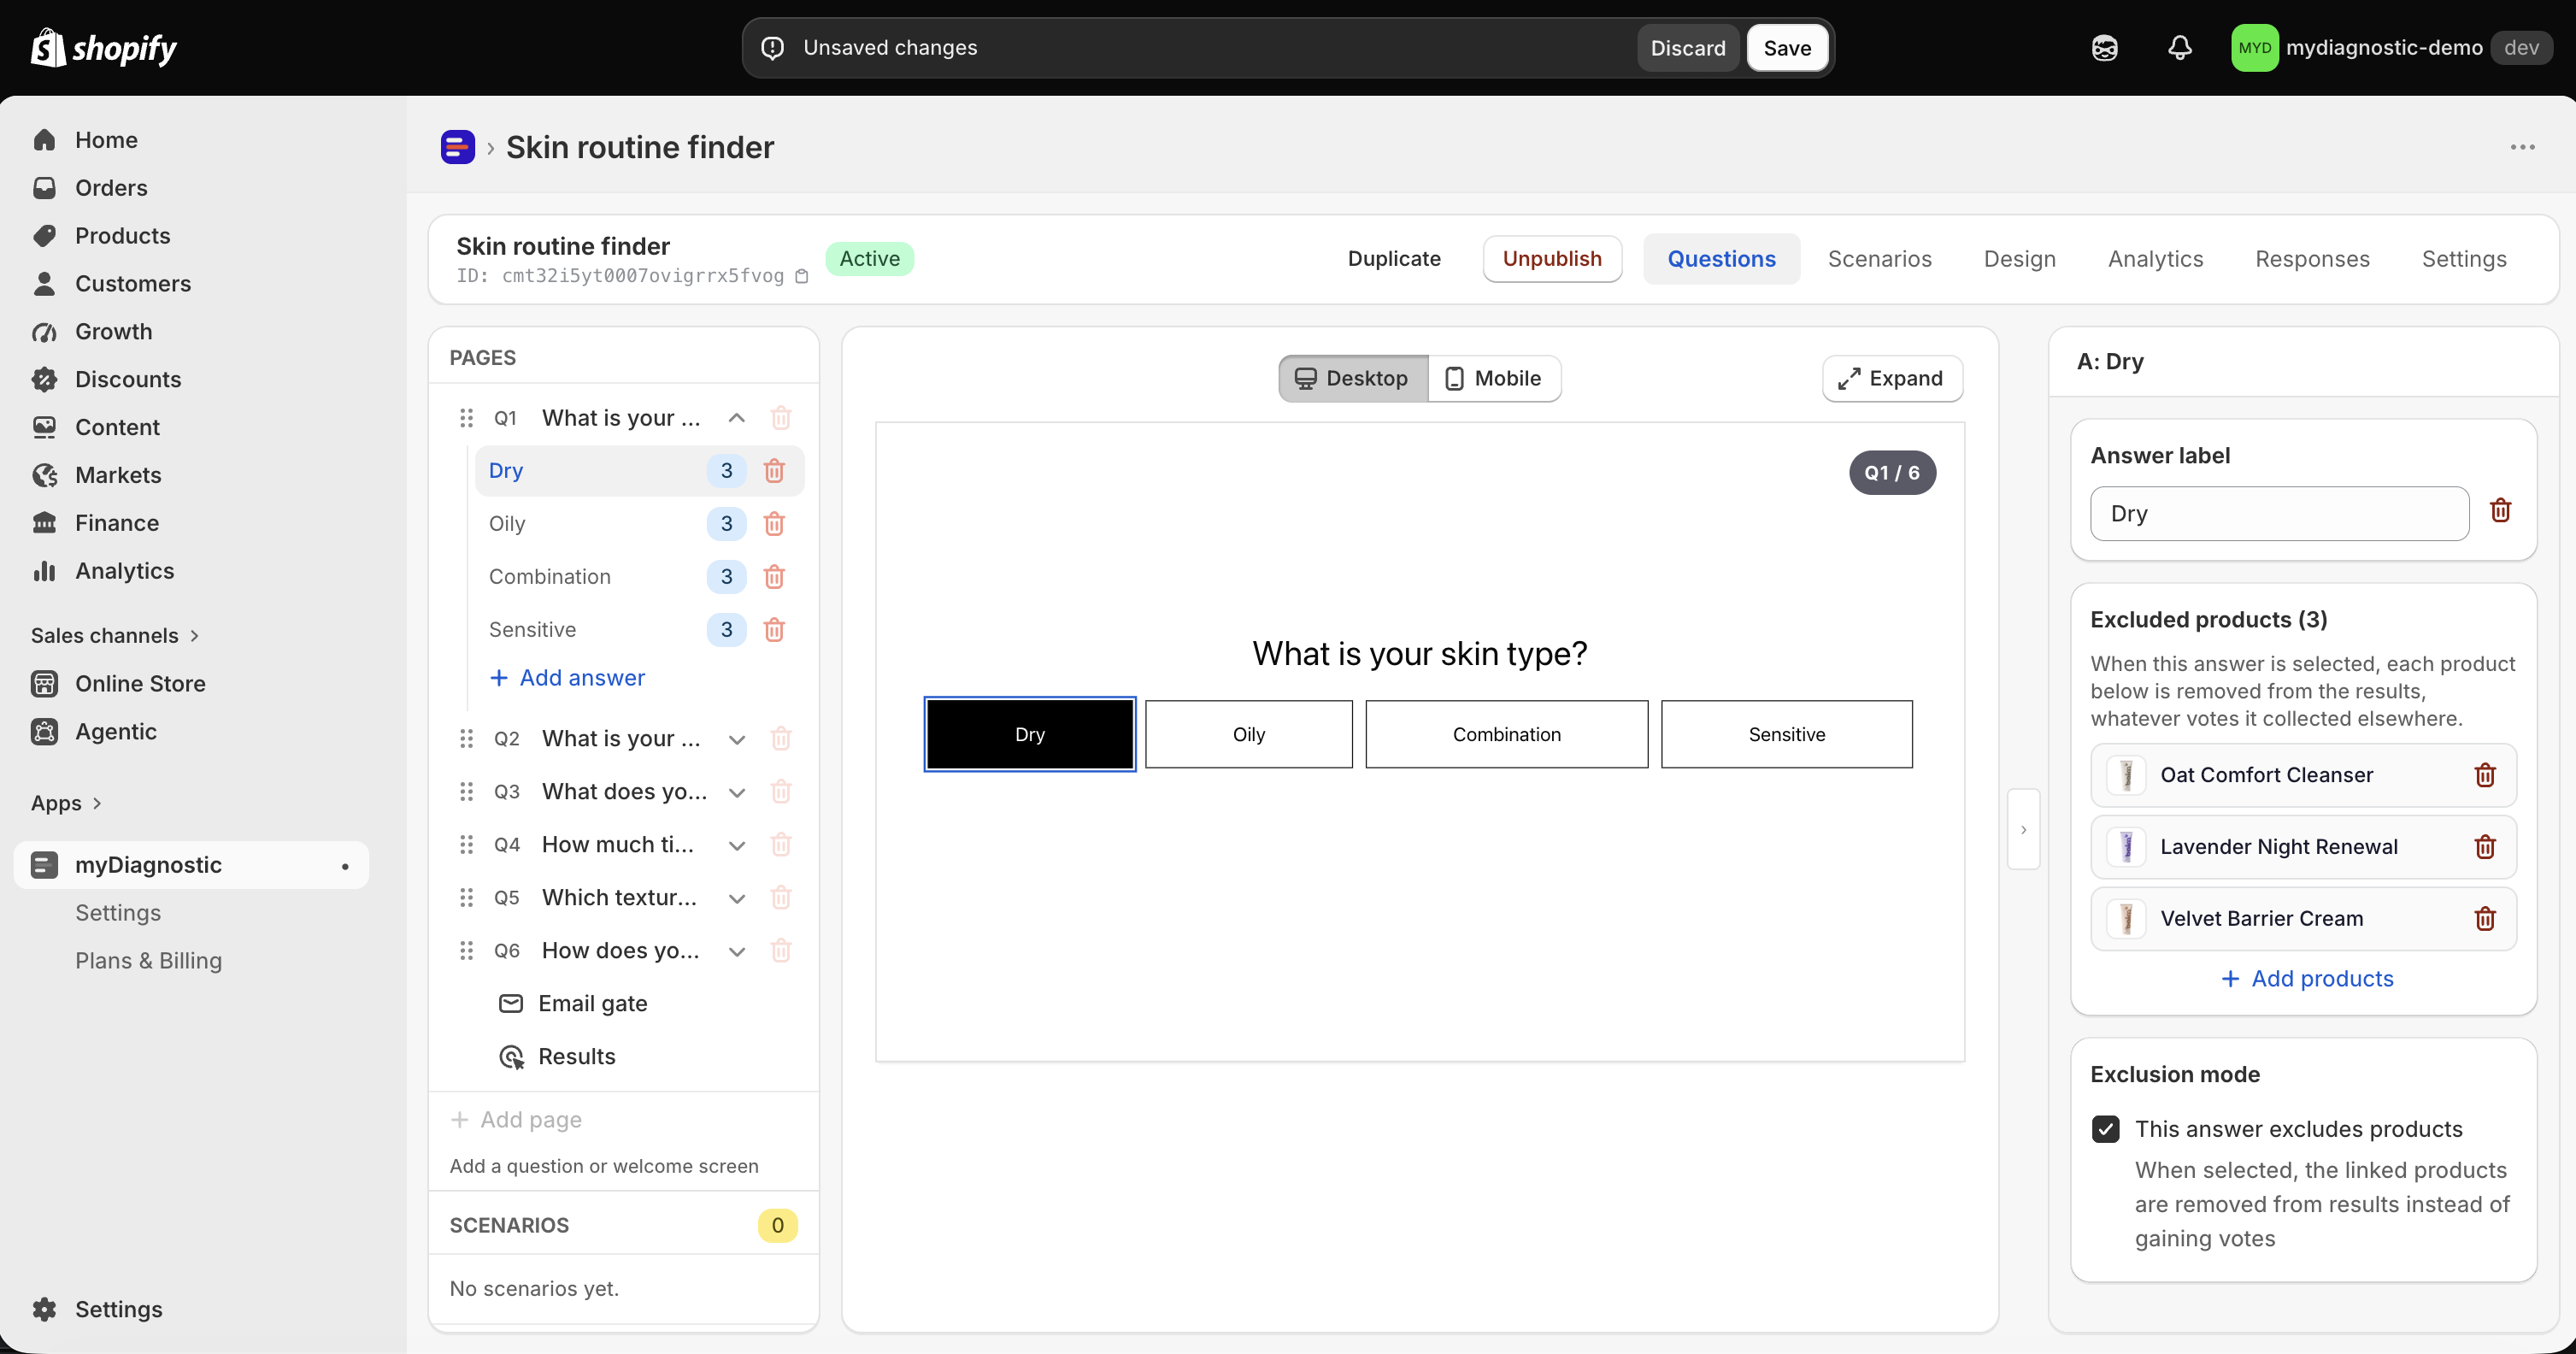
- Select the answer in the left sidebar.
- Turn on This answer excludes products in the Exclusion mode section.
- Attach the products to rule out with Add products.
The toggle carries the help text When selected, the linked products are removed from results instead of gaining votes. The products section is then titled Excluded products and reads When this answer is selected, each product below is removed from the results, whatever votes it collected elsewhere.
The weight buttons disappear, because an excluded product collects no points. The weights you had set are kept: turn the toggle off and they come back as they were.
An excluded product cannot return. It is taken out before the three winners are picked, whatever points other answers gave it, and the next product by points takes its place in the trio.
A quiz needs at least one product on an answer that does not exclude. If every answer carrying products excludes them, there is nothing left to recommend, Publish stays disabled, and the reason reads Assign at least one product to an answer before publishing: without a product vote the result screen has nothing to show.
Filter answers from an earlier question
A question can hide the answers the customer already selected in an earlier question, so they are not asked the same thing twice.
- Select the question whose answers you want to shorten.
- Choose the earlier question in Filter answers from, in the Answer filtering section.
The setting carries the help text Hide answers whose text was already selected in the chosen question. None turns the filter off.
The match is made on the text of the answers, not on any link between them. An answer of this question is hidden when its label is exactly the label of an answer the customer selected in the question you point at. Two answers that read the same are matched, whether you meant them to be or not. Two answers that mean the same thing but read differently are never matched.
So write the two labels identically, character for character, including capitals, accents, punctuation and spacing. Dry skin and Dry skin. are two different answers to this filter.
The same rule applies to each language you publish. The comparison is made on the text the customer is served, so if the two labels are translated the same way in your default language but differently in another one, the filter works in the first and not in the second, and the customer sees the answer you meant to hide. Check the pair in every language of the quiz, see Secondary languages.
Two more things to know about this setting. The list of questions in Filter answers from numbers them from zero, so the first question of the quiz reads Q0 there while the sidebar shows it as Q1: count the questions from the top of the sidebar rather than trusting the number. And if you delete the question a filter points at, the filter stops applying, with no warning and no visible change to the setting.
Reorder the pages
Questions are asked in the order of the left sidebar, and that order is changed by dragging.
- Save or discard any pending change.
- Drag a page by the handle at the start of its row, which carries the title Drag to reorder.
- Drop it where you want it in the list.
Email gate and Results sit at the bottom of the list, with no handle. They cannot be moved, and nothing can be placed after them.
The new order is written to the quiz as soon as you drop, which is why the handle does nothing while you have unsaved changes.
Moving the welcome screen changes nothing for the customer. Whatever its position in the sidebar, the quiz is always served in the same sequence: the welcome screen, then the questions, then the email gate if it is on, then the result. Only the order of the questions among themselves has an effect on what the customer sees.
The welcome screen and its capture fields
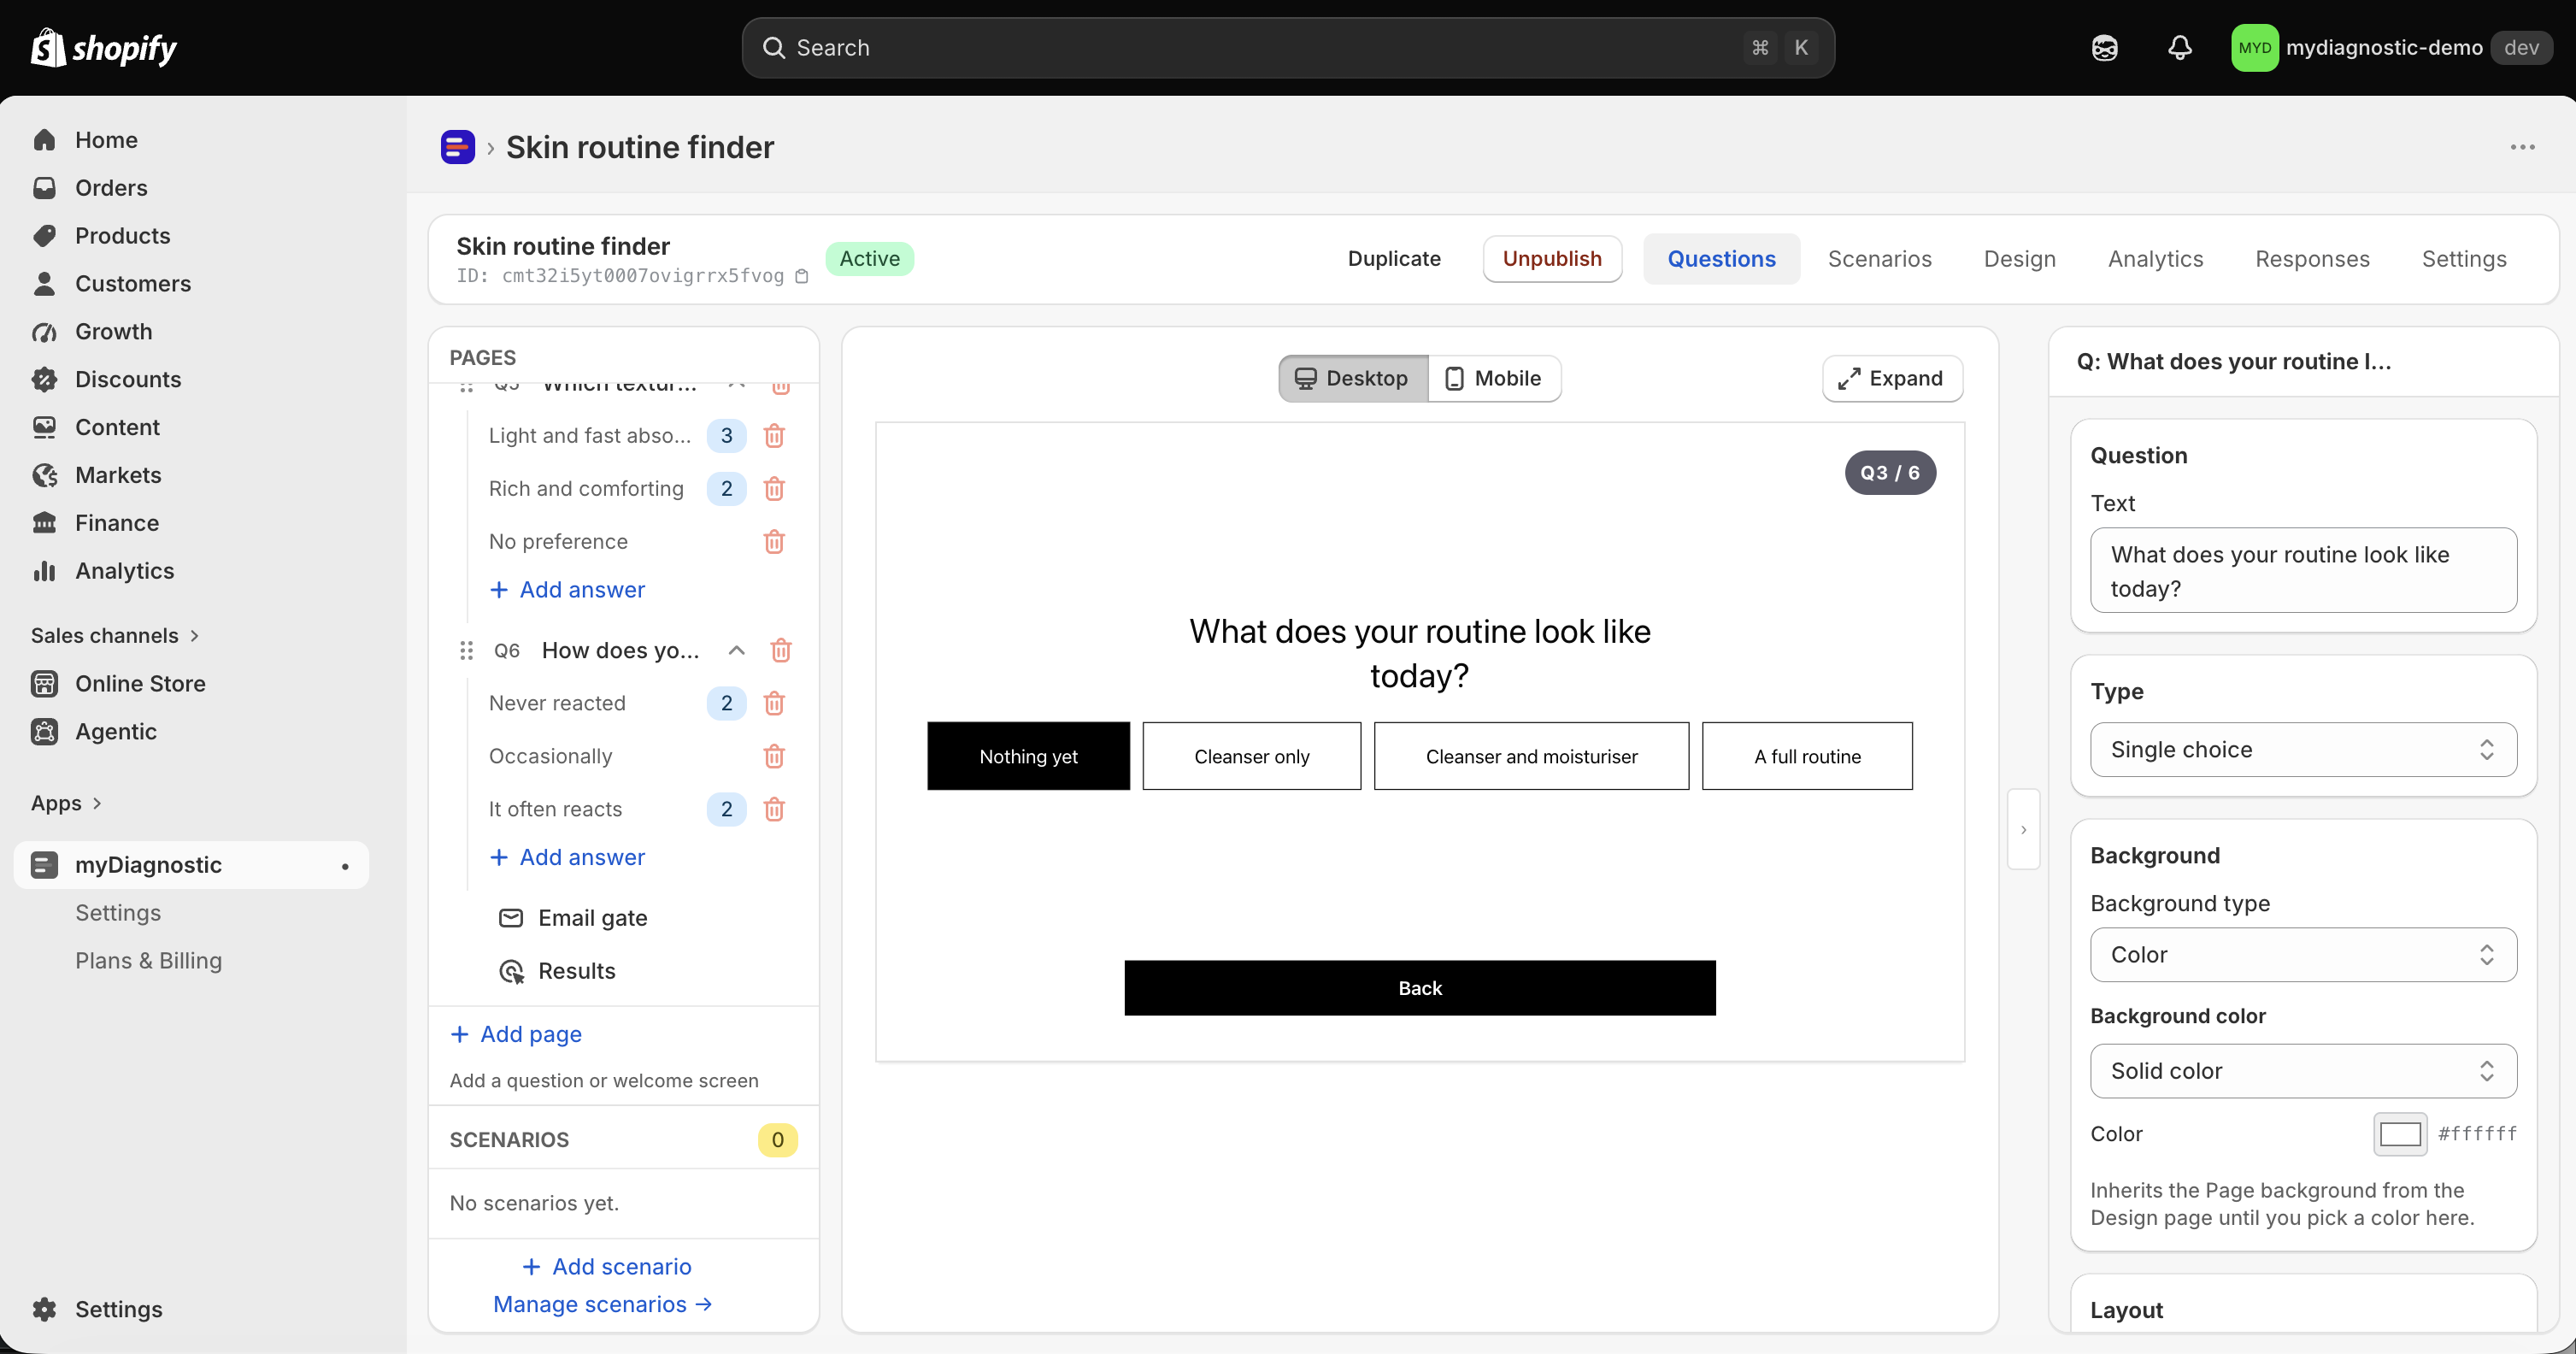
The welcome screen is the intro screen of the quiz, and it is the only page that can ask the customer for anything other than an answer.
Select it in the left sidebar to open its five sections: Layout, Background, Title & Subtitle, CTA Button and Capture fields. What the customer reads, the button that starts the quiz and the background all live there, and they are covered in Welcome screen.
Capture fields are the boxes the customer fills in before starting. They exist on the welcome screen and nowhere else: a question page has none, and the email gate has its own fixed set instead.
To add one of the usual fields:
- Select the welcome screen in the left sidebar.
- Open the Capture fields section.
- Select one of the buttons under Quick add:, which offers + Name, + Age, + Email and + Phone.
Each button disappears once the field it adds is on the page.
To add anything else:
- Select Add custom field.
- Enter the wording the customer reads in Label.
- Choose Field type: Text, Number, Email, Phone, Select (dropdown), Textarea or Checkbox.
- Choose where the value is kept in Store as: Name (respondentName), Age (respondentAge), Email (respondentEmail), Phone (captureData.phone) or Custom (captureData.<key>).
- Select Save.
Fields are shown to the customer in the order of the list, and that order is changed with the ▲ and ▼ arrows at the start of each row.
Give each field its own destination in Store as. Two fields pointing at the same one raise the warning Duplicate storage mapping, and only one of the two values is kept on the response, so the other is lost with no way to recover it. Custom (captureData.<key>) is free of that: each custom field is kept under its own key.
Save your work
Everything you write in the panel on the right is held until you save it. A bar appears at the top of the screen as soon as something changes, offering Save and Discard, and one Save writes the whole set of changes at once.
Held until you select Save:
- The text of a question, its type, its maximum number of selections and its display mode.
- Adding an answer, its label, its exclusion toggle and deleting it.
- Attaching products to an answer, removing them, and their weights.
- The answer filtering setting, the page settings, the capture fields and the translations.
Written to the quiz immediately, before any save:
- Adding a page and deleting a page.
- Reordering the pages.
- Uploading an image, which goes to your Shopify files the moment you pick the file.
- Publishing and unpublishing.
Discard does not undo any of those four. A question you added and then discarded stays in the quiz, empty and with no answer, and a customer would be shown it. Delete it from the sidebar with its trash icon and confirm with Delete question.
Adding, deleting or moving a page needs an editor with nothing pending, so those controls are disabled while a change is waiting, with the title Save or discard your changes first. Save or discard first, then add or move the page.
Leaving the editor with a change pending raises a confirmation. Confirming the departure loses everything the bar was holding, so use it only when that is what you want.