Install the app
This page takes you from the myDiagnostic listing on the Shopify App Store to the app open in your Shopify admin. By the end you know what the app can read in your store, what the screen shows you on a fresh install, and what the Free plan allows.
Before you start
- A Shopify store with at least one product.
- An account allowed to install apps on that store.
Install from the Shopify App Store
- Open the myDiagnostic listing on the Shopify App Store.
- Select Add app.
- Sign in to the store you are installing on, if you are asked to.
- Read the access list on the permission screen.
- Select Install.
- Wait for the app to open in your Shopify admin.
What the app asks access to
The permission screen lists two accesses, and nothing else.
- View staff and contributor data, limited to the store owner. No other staff or contributor account is read.
- View and edit store data, limited to Products and Shopify admin. The quiz recommends your products, so the app reads their titles, images and prices to show them while you build the quiz and on the result screen your customer sees. The Shopify admin part covers the files of your store: an image you upload in the quiz editor is saved to your own store, not to a third party.
The app asks for no access to your theme. It cannot read the pages of your online store and it cannot change a theme file, which is why placing the quiz on a page is something you do yourself in the theme editor.
The app also asks for no access to your orders and none to your customer records. An email address reaches the app only when a visitor types it into the quiz.
What you see after installing
The app opens on the quiz list. A new install holds none, so the card reads No quiz yet, with a Create quiz button beside it.
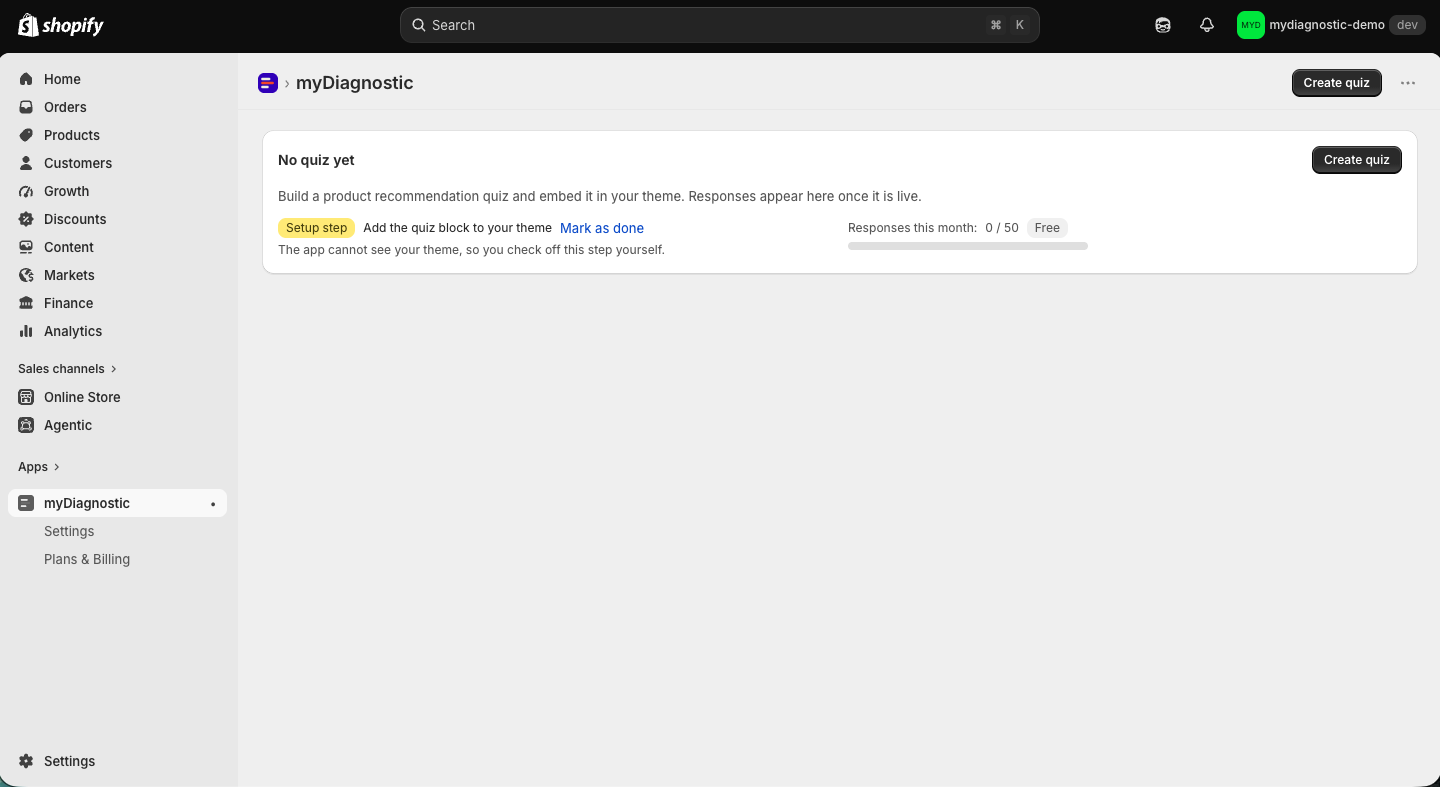
Under that card, a Setup step badge reads Add the quiz block to your theme, followed by a Mark as done link. The app cannot see your theme, so this step records your own confirmation and nothing more. Leave it unticked until the block is really in place, see Add the theme block.
The same card carries Responses this month: 0 / 50 and a Free badge, which is your monthly quota and the plan you start on.
The navigation on the left of the app holds three entries: myDiagnostic for the quiz list, Settings for the settings shared by every quiz, and Plans & Billing for your plan and your usage.
What the Free plan allows
The Free plan is what every install starts on, and it is permanent, with no card to enter. It gives you one published quiz at a time, 50 responses per month, and the Powered by myDiagnostic badge under the quiz on your storefront. Drafts are not counted, so you can build several quizzes and publish whichever one you want live.
Any paid plan removes the badge and raises both limits, and the first one you subscribe to opens a 14 day free trial, run by Shopify and billed only once it ends. For what each plan costs and includes, see Plan comparison. For what happens when a limit is reached, see Plans and quotas.
Open the app again later
- Open your Shopify admin.
- Select Apps.
- Select myDiagnostic.
Uninstall the app
- Open your Shopify admin.
- Select Settings, then Apps and sales channels.
- Find myDiagnostic in the list.
- Select Uninstall.
Your quiz stops being served on your storefront straight away, and Shopify cancels the subscription if you were on a paid plan. Shopify then asks the app to delete your store data 48 hours after the uninstall: quizzes, questions, scenarios, responses and collected email addresses are removed at that point, and reinstalling afterwards starts from an empty quiz list. Export the responses you want to keep before you uninstall, see Data and privacy.
The block stays in your theme and renders nothing. Remove it from the theme editor when it suits you.