Add the theme block
The app opens the theme editor with the myDiagnostic Quiz block already added and already selected, so there is nothing for you to insert. By the end of this page the block sits where you want it, it shows the quiz you chose, and the setup step is marked as done in the app.
Before you start
- A quiz in the app.
- Access to the theme editor of your online store.
- An Online Store 2.0 theme, the only theme type that accepts app blocks.
Publish the quiz
The block serves a quiz that is Active and nothing else. A quiz left in Draft is refused, whichever way the block points at it, so publish it before you place anything.
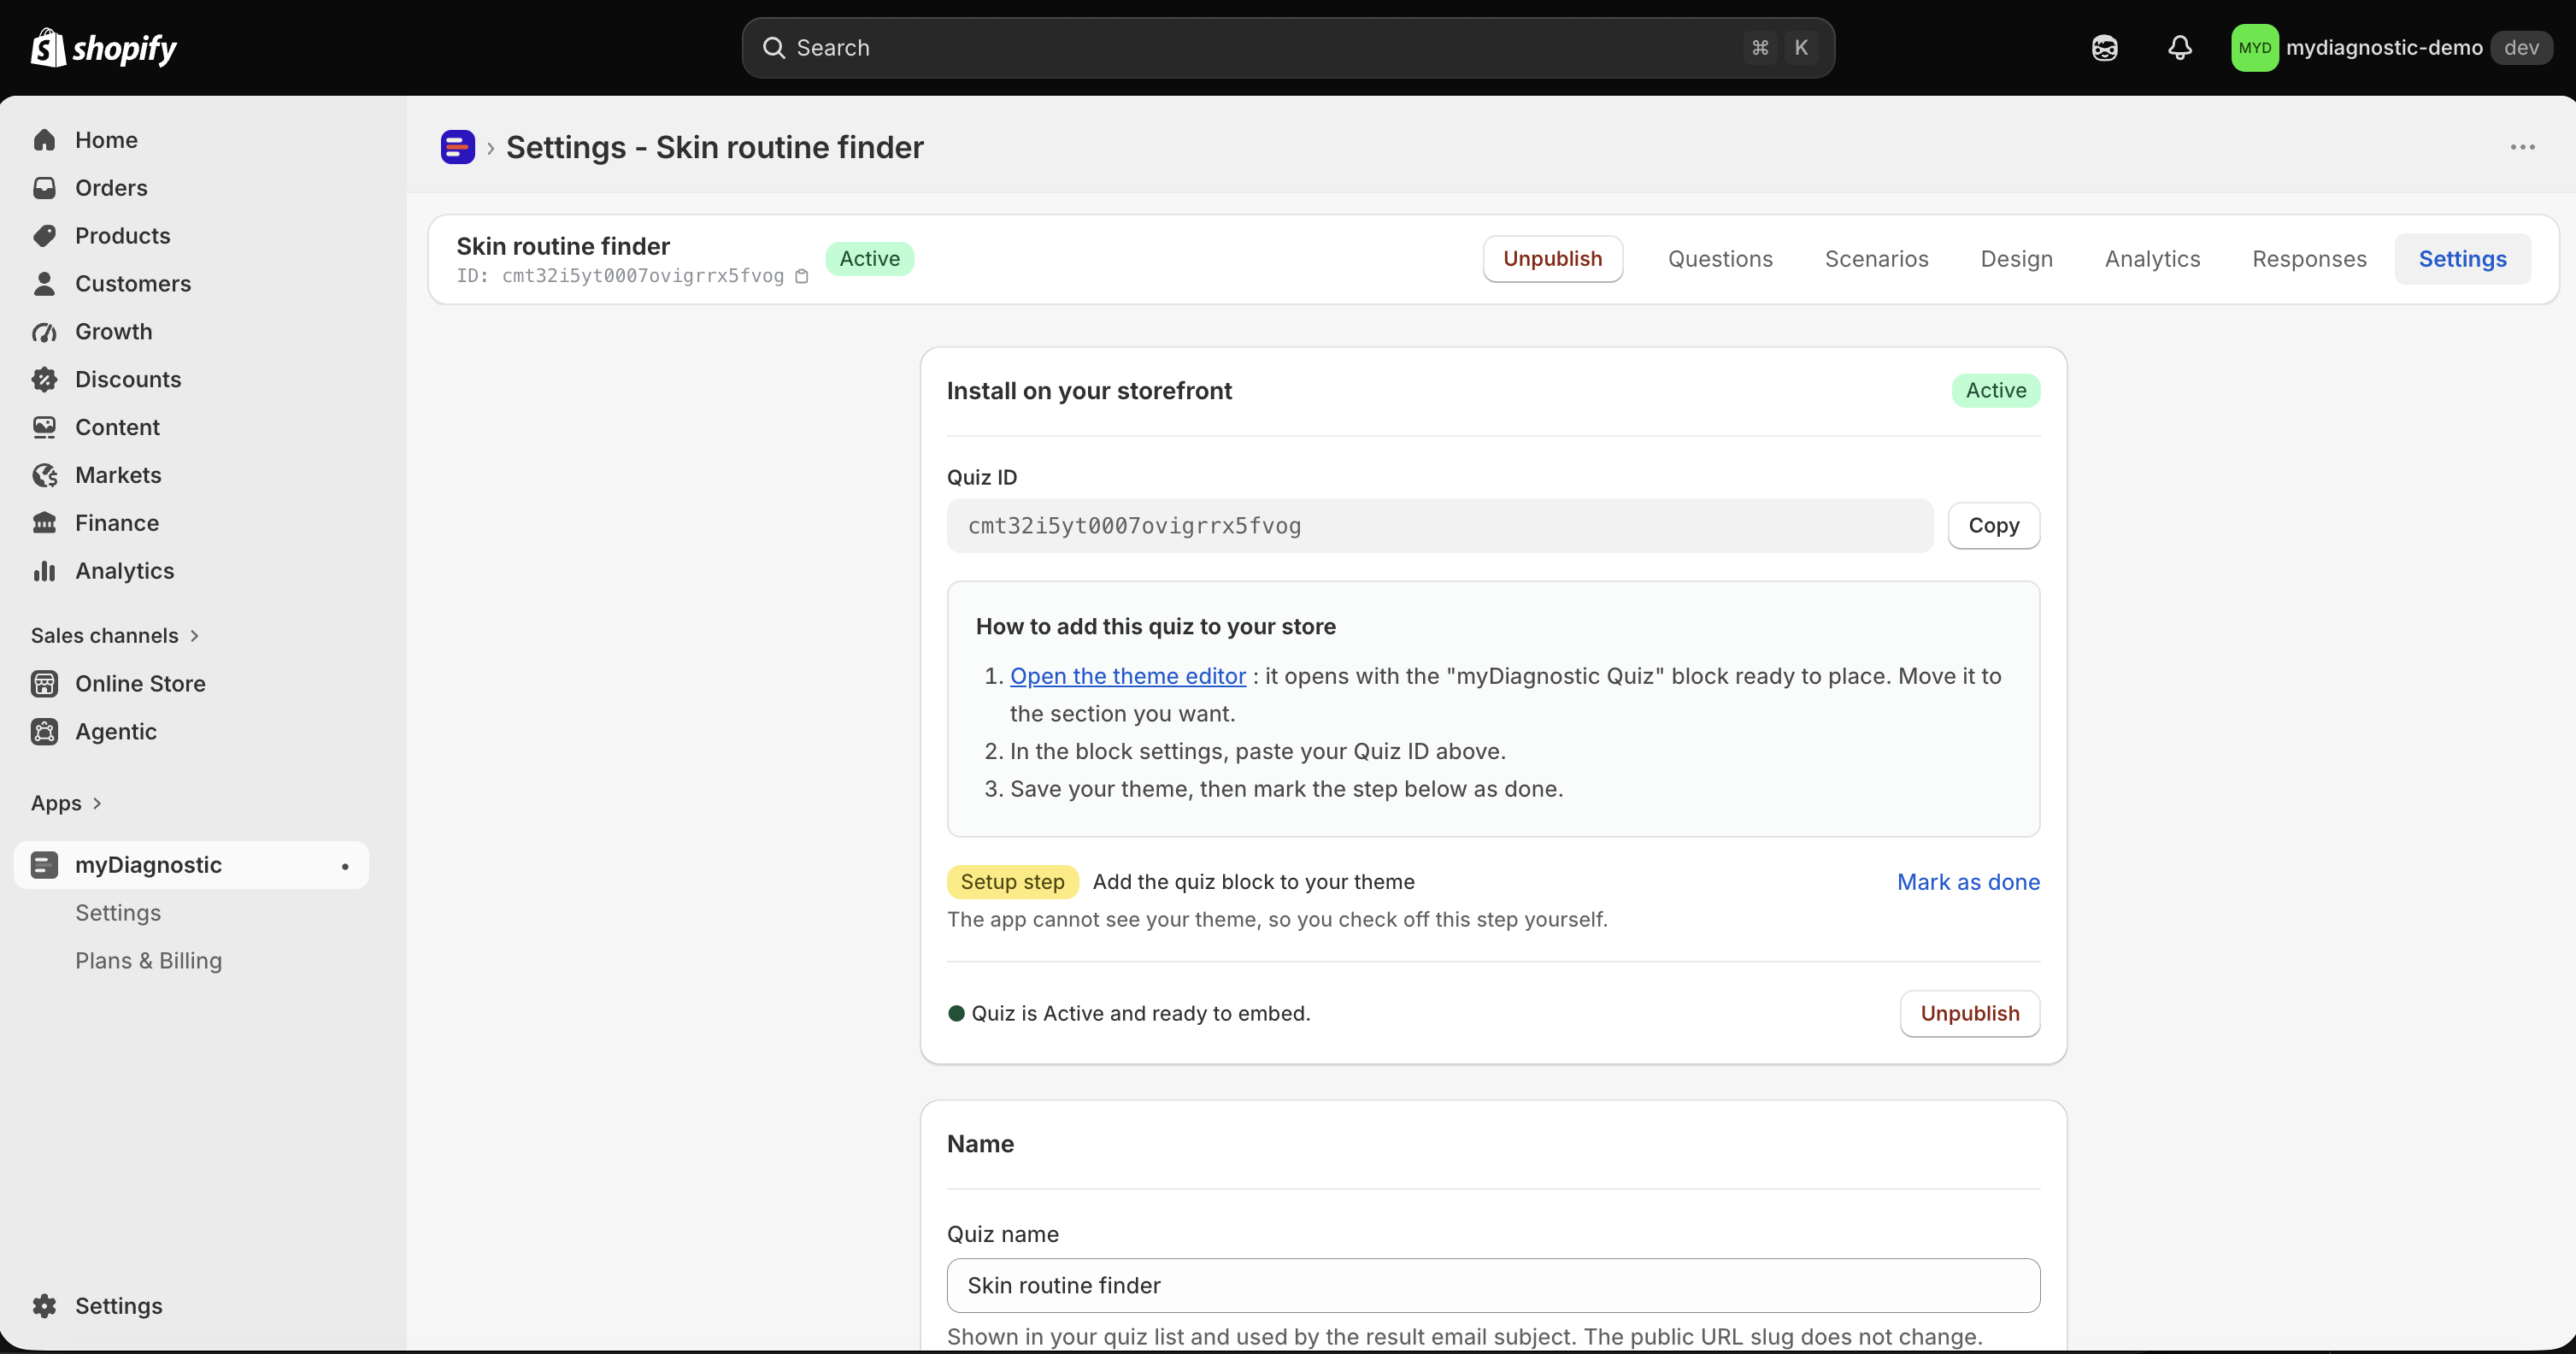
The Install on your storefront card, in the Settings tab of the quiz, tells you which of the two you are on.
- On a draft quiz the card reads Quiz is in Draft. Publish it before installing on your storefront. and carries a Publish button.
- On a published quiz it reads Quiz is Active and ready to embed. and carries an Unpublish button.
Copy your Quiz ID
Each quiz carries an identifier of its own. It is what tells the block which quiz to show.
- Open the app in your Shopify admin.
- Select the quiz you want to place.
- Open the Settings tab of that quiz.
- Find the Install on your storefront card at the top of the page.
- Select Copy beside the Quiz ID field.
A Quiz ID copied message confirms that the identifier is on your clipboard. If copying is refused by your browser, select the text in the field and copy it by hand.
Open the theme editor
myDiagnostic ships an app block called myDiagnostic Quiz. An app block is not a standalone section: it lives inside a section of your theme, and you move it around like any other block.
- Select Open the theme editor in the Install on your storefront card.
- Wait for the theme editor to open in a new tab, on the home page of your online store.
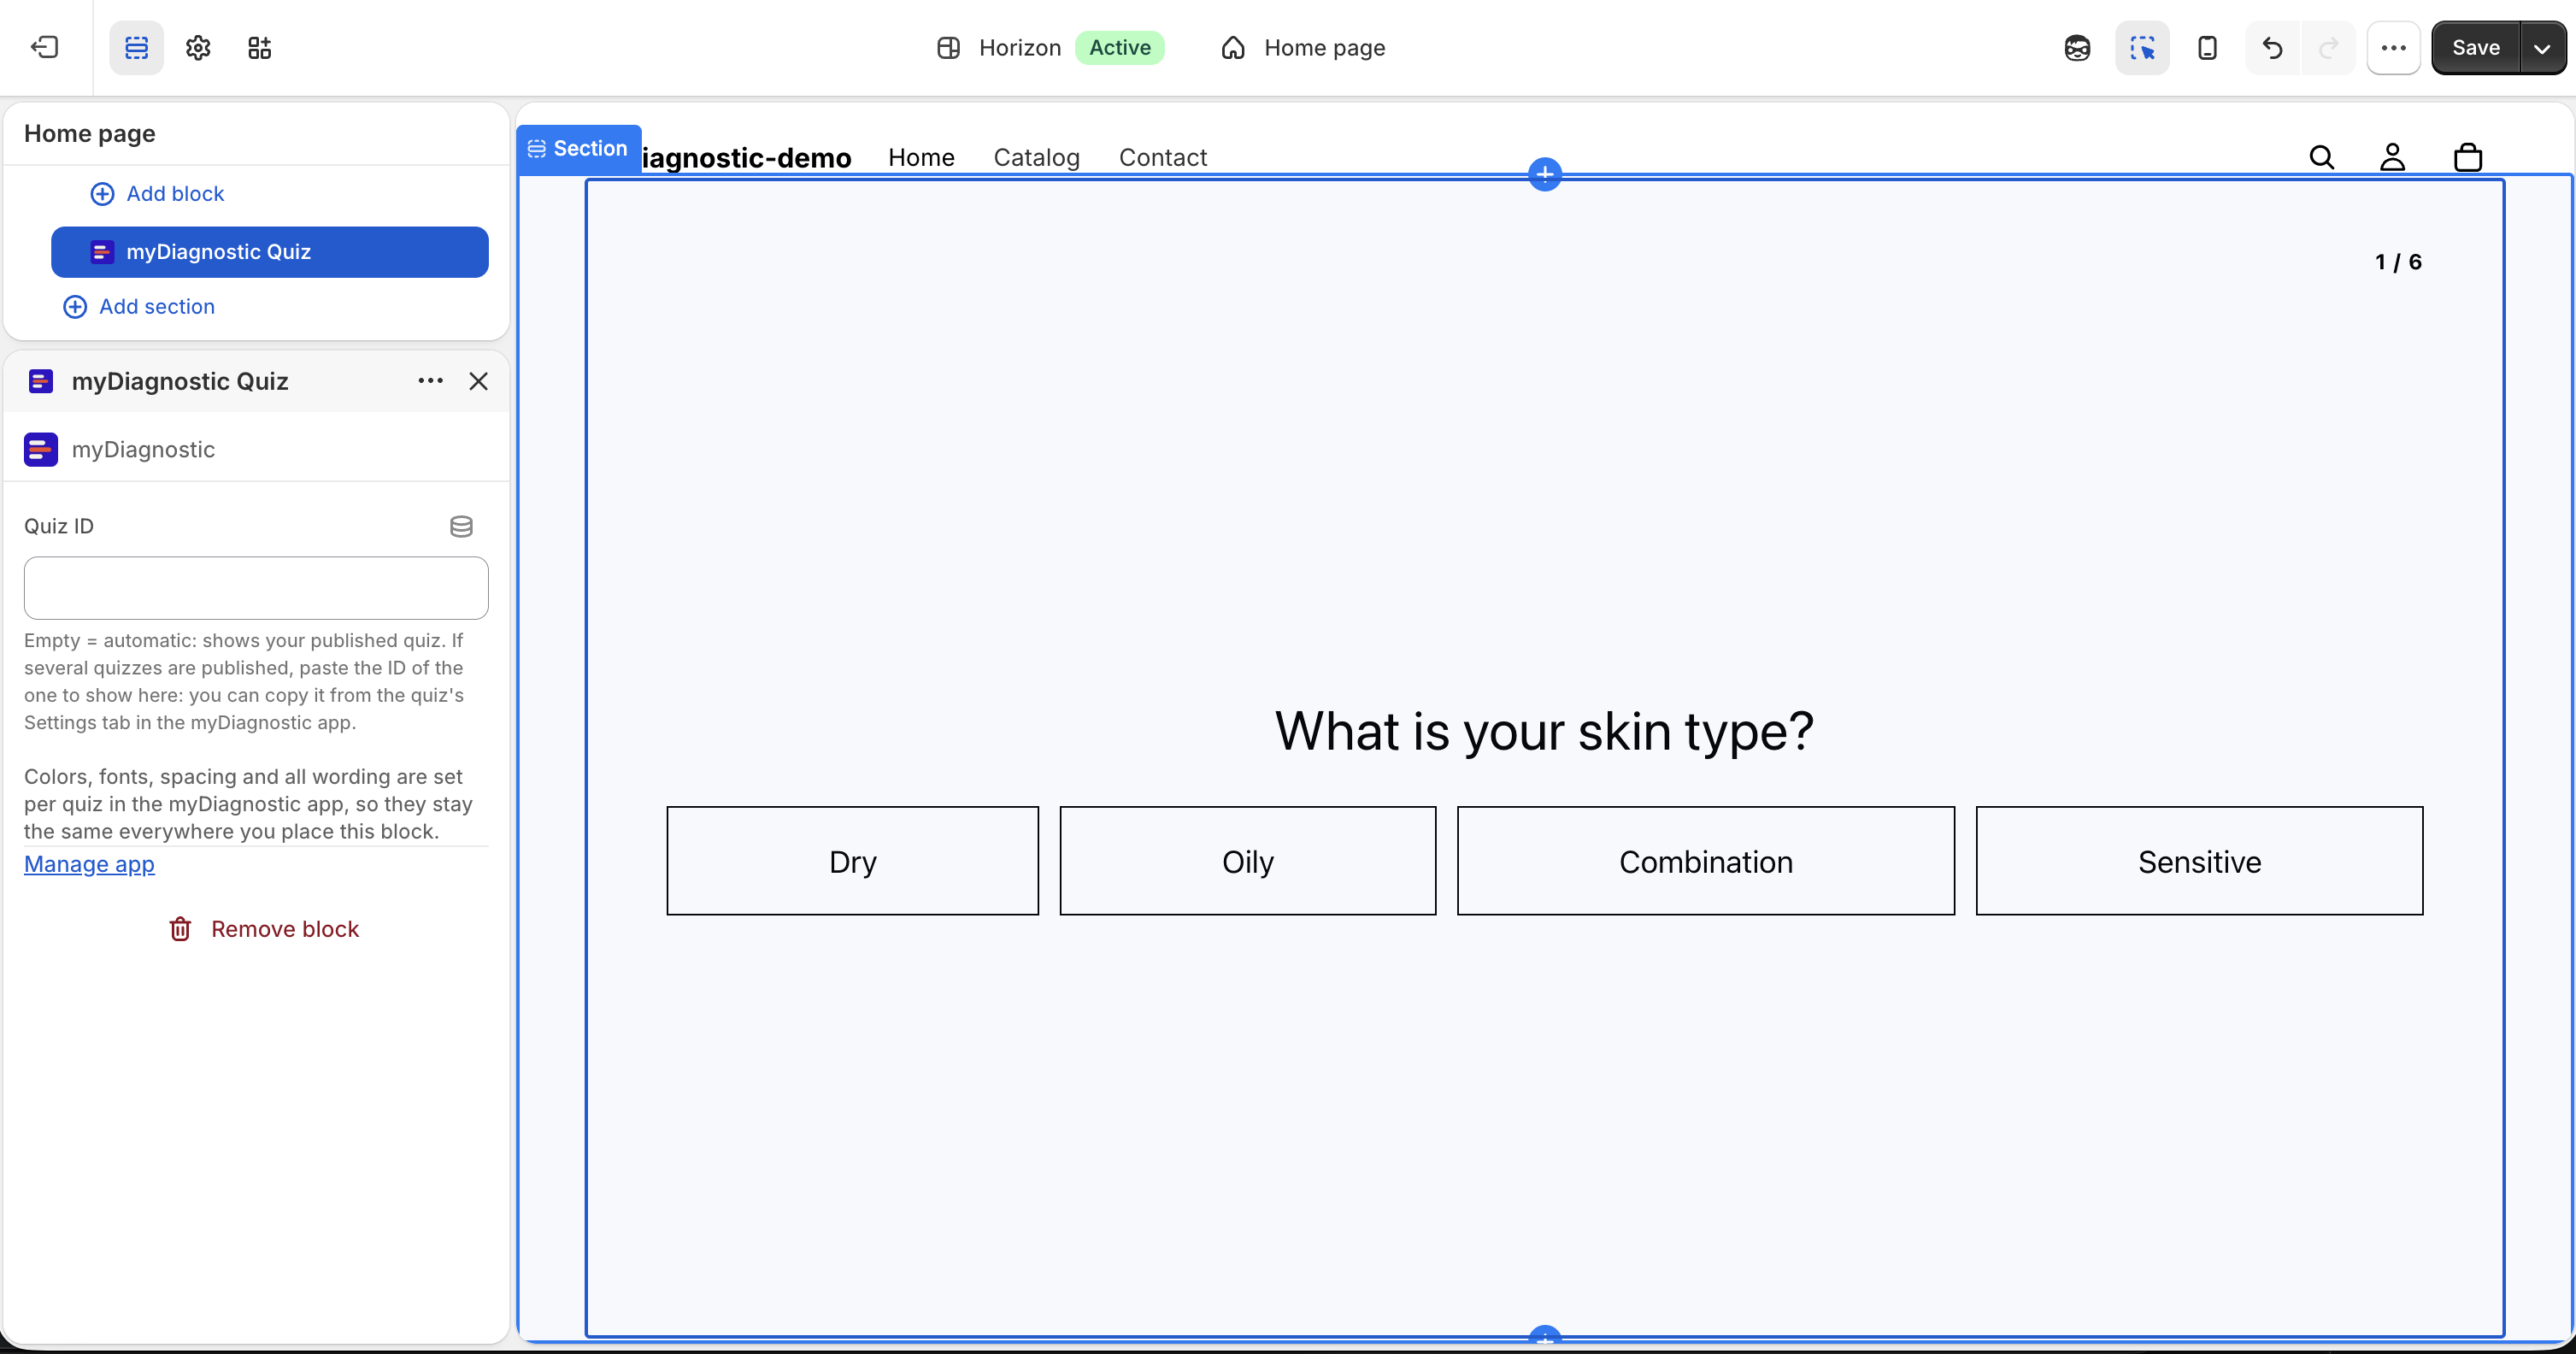
- Find the myDiagnostic Quiz block in the left sidebar: it is already there, already selected, and its settings panel is open beside the preview.
- Drag the block in the left sidebar to the position you want on the page.
- Select Save.
The block is added for you, so you never need Add block or Add section to place it. Nothing reaches your online store until you select Save.
The block settings panel
Select the myDiagnostic Quiz block in the left sidebar to open its panel again at any time.
The panel holds the Quiz ID field, with help text under it restating what an empty field does and where an identifier is copied from. Manage app takes you back to myDiagnostic in your Shopify admin, and Remove block takes the block off the template you are editing.
The block carries no appearance settings. Colours, fonts, spacing and wording belong to the quiz itself, so they stay the same everywhere you place the block.
Leave the Quiz ID field empty
The block asks the app which quiz is published, and shows it. This works when exactly one quiz is published, and the theme editor preview shows you the quiz your customers will see.
When several quizzes are published, the preview reads You have 2 quizzes published. Paste the Quiz ID of the one to show in the block settings., with your own number of published quizzes in place of the 2. Your online store shows nothing at all: the app never guesses which of several quizzes a customer should see.
When no quiz is published, the preview reads Publish a quiz in the myDiagnostic app to show it here. and your online store shows nothing at all.
When the preview gets no answer from the app, it reads Your quiz will appear on your live store. To preview it here, paste its Quiz ID in the block settings. That one says nothing about your online store, which keeps serving the quiz as usual. Paste the Quiz ID into the field and the quiz appears in the preview.
None of those three messages leaves the theme editor. A customer never sees any of them.
Paste a Quiz ID
The block shows that one quiz, whatever else is published in the app.
- Select the myDiagnostic Quiz block in the left sidebar of the theme editor.
- Paste your Quiz ID into the Quiz ID field.
- Select Save.
We recommend pasting the Quiz ID as soon as you have more than one quiz, so the page you are editing keeps showing the quiz you meant even after you publish another one.
Choose which templates carry the quiz
The theme editor works one template at a time. The selector at the top of the editor names the template you are editing, Home page when the editor opens from the app.
Change template with that selector and the block is already in the left sidebar there too: there is nothing to remove and nothing to add. Position it and select Save on every template you want the quiz on.
A template covers every page built from it. Placing the block on Default collection puts the quiz on all of your collection pages, not on one of them.
Each page is an independent session. A customer who starts the quiz on one page and then opens another page starts again from the first screen, with no answers carried over.
Two quiz blocks on the same page do not work. The second block never gets past its loading indicator, whichever quiz it points at. Place one quiz block per page.
Confirm the step in the app
The app has no access to your theme. It cannot read your pages, it cannot tell whether the block is in place, and it never changes a theme file. The setup step in the app records your own confirmation and nothing more.
- Return to the Settings tab of the quiz.
- Find the Install on your storefront card.
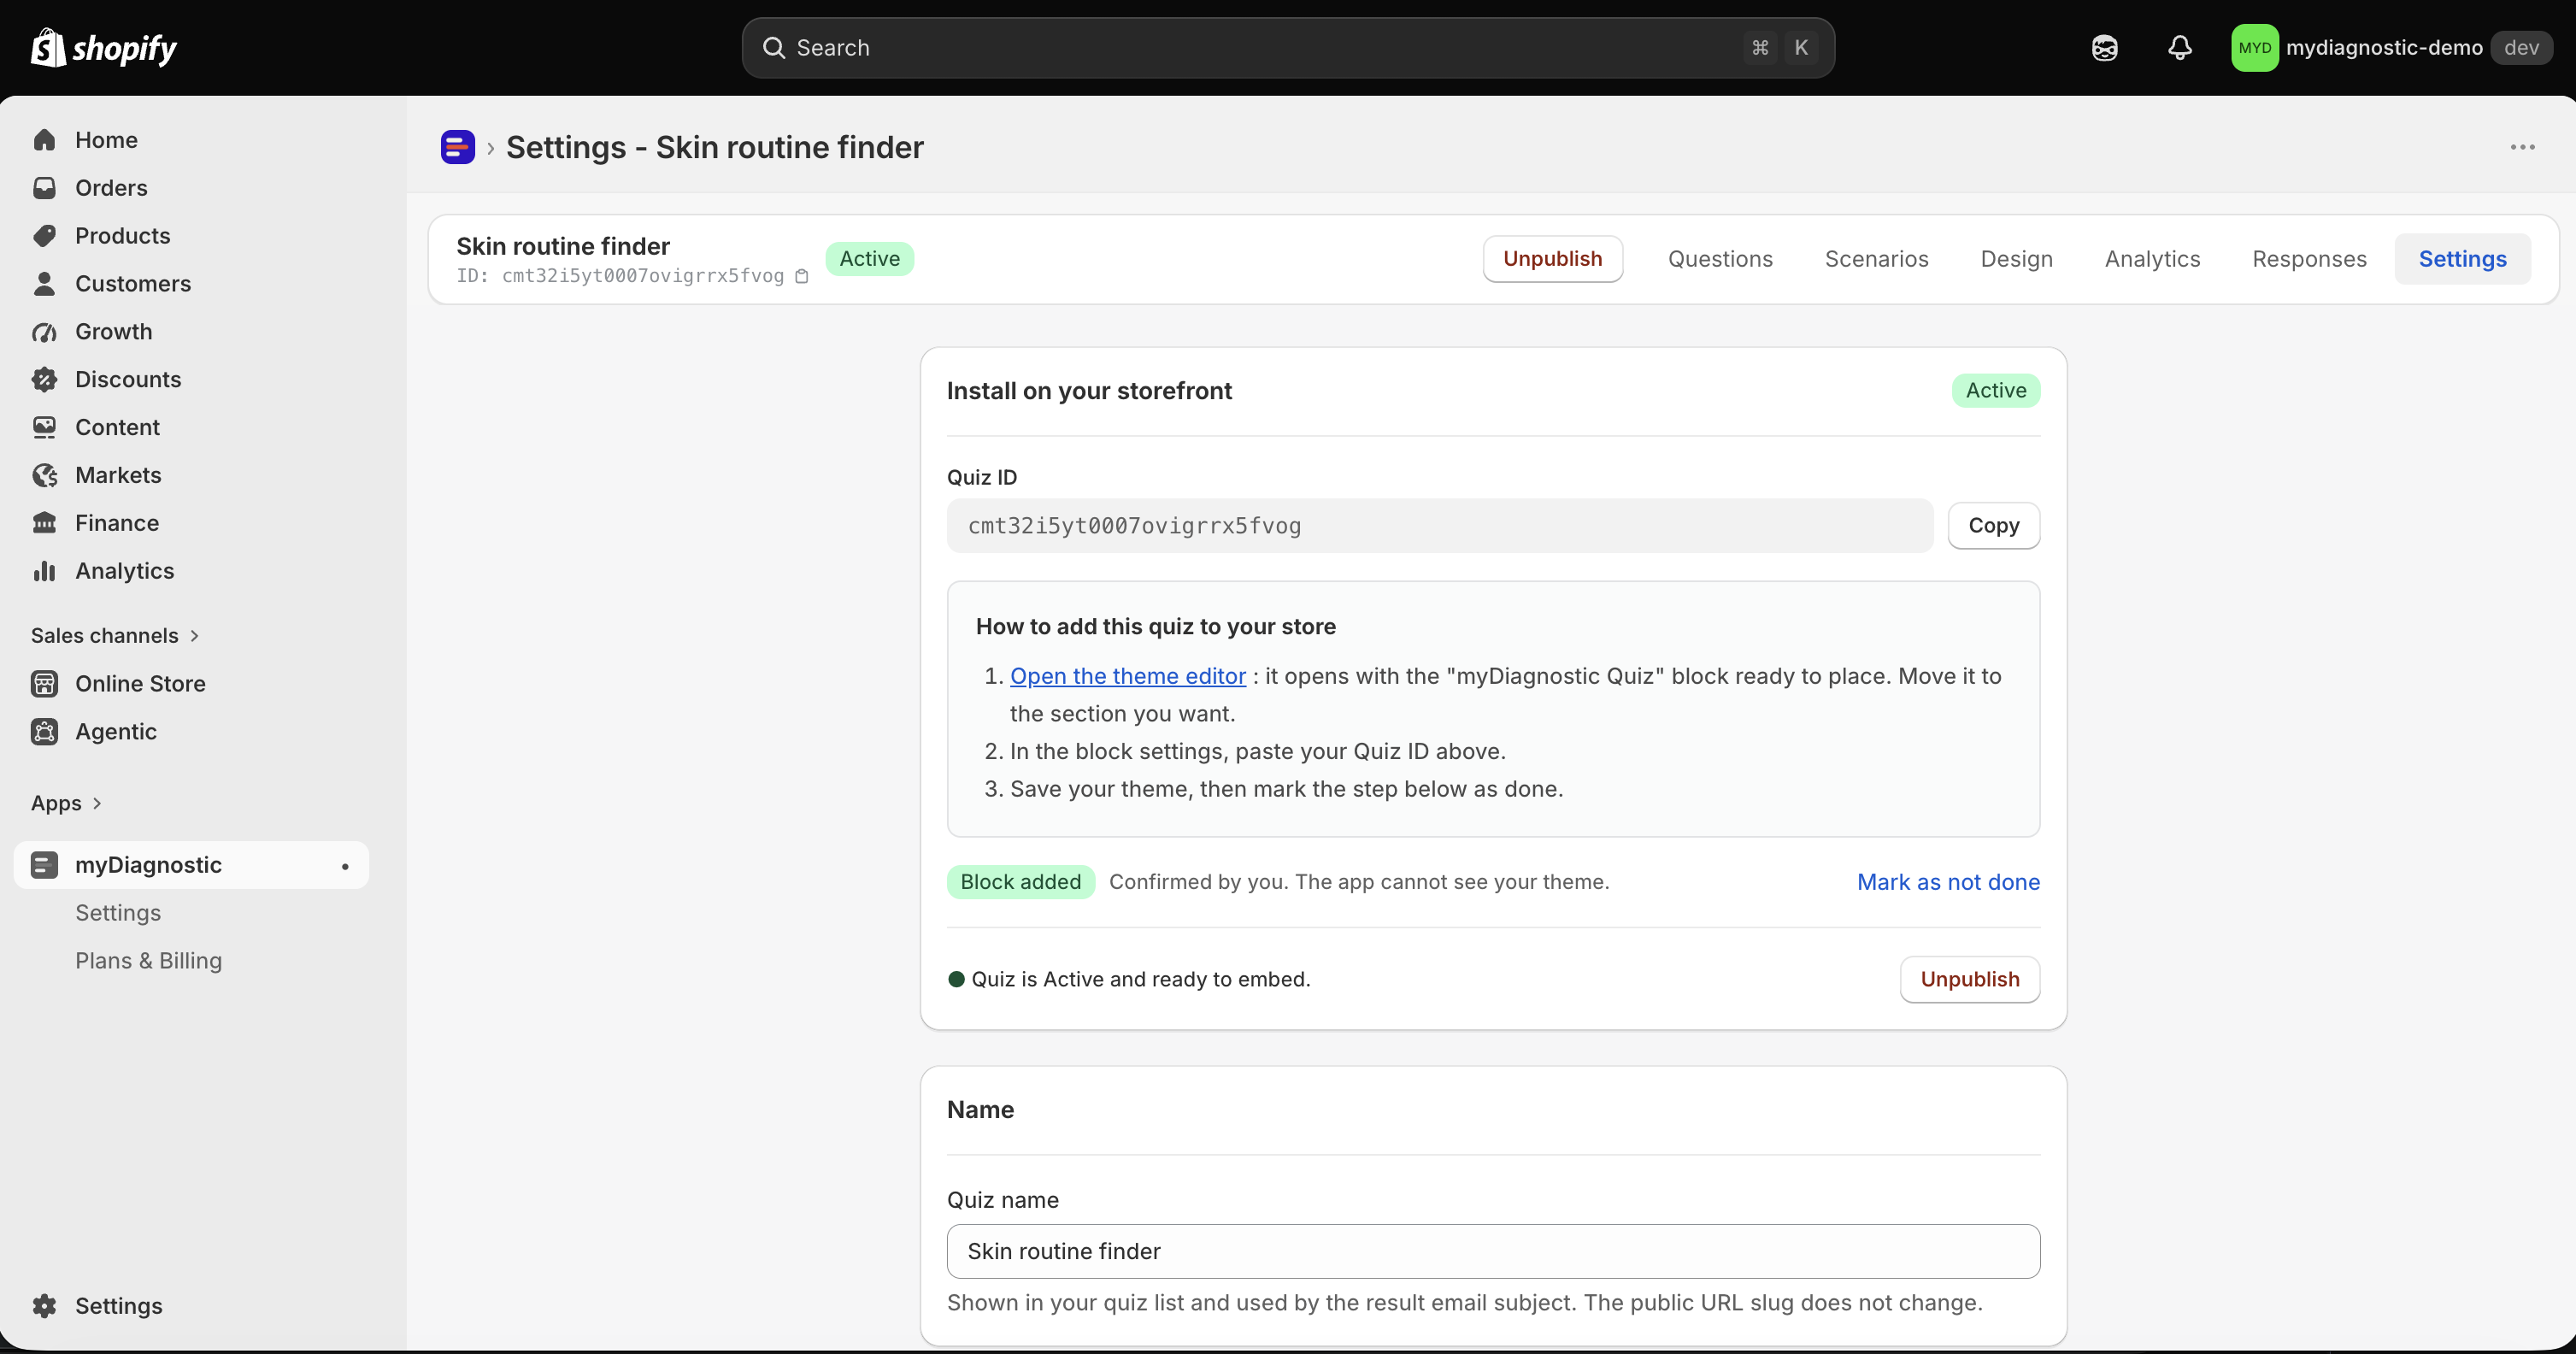
- Select Mark as done beside the Setup step badge.
The badge then reads Block added, followed by the line Confirmed by you. The app cannot see your theme. Select Mark as not done to reverse it.
This confirmation covers your whole store, not one quiz. Marking it done from one quiz marks it done everywhere in the app.
When the quiz does not appear on your online store
Two causes account for most of it, and they show opposite symptoms. Read the page as a customer sees it before looking further: an error message means the block found a quiz and was refused it, an empty space means the block found no quiz to show.
A visible error message where the quiz should be. The Quiz ID in the block points at a quiz that is still in Draft. The message reads Quiz temporarily unavailable. Please try again. in the language of your online store. Open that quiz in the app, select Publish, and check that its badge reads Active.
Nothing at all, as though the block were absent. The Quiz ID field is empty and no quiz is published, or several are. Publish exactly one quiz, or paste the Quiz ID of the quiz you want into the block.
The theme was not saved. A block reaches your online store only once you select Save, on each template you placed it on. Reopen the theme editor and check that the block is still there.
One delay is worth knowing about. When the Quiz ID field is empty, the app's answer is kept for one minute, so a quiz you published a moment ago can take up to a minute to appear. Wait a minute and reload the page before changing anything else.